

Pumpkin Hand Pies

on Oct 25, 2022, Updated Nov 06, 2026
This post may contain affiliate links. Please read our disclosure policy.
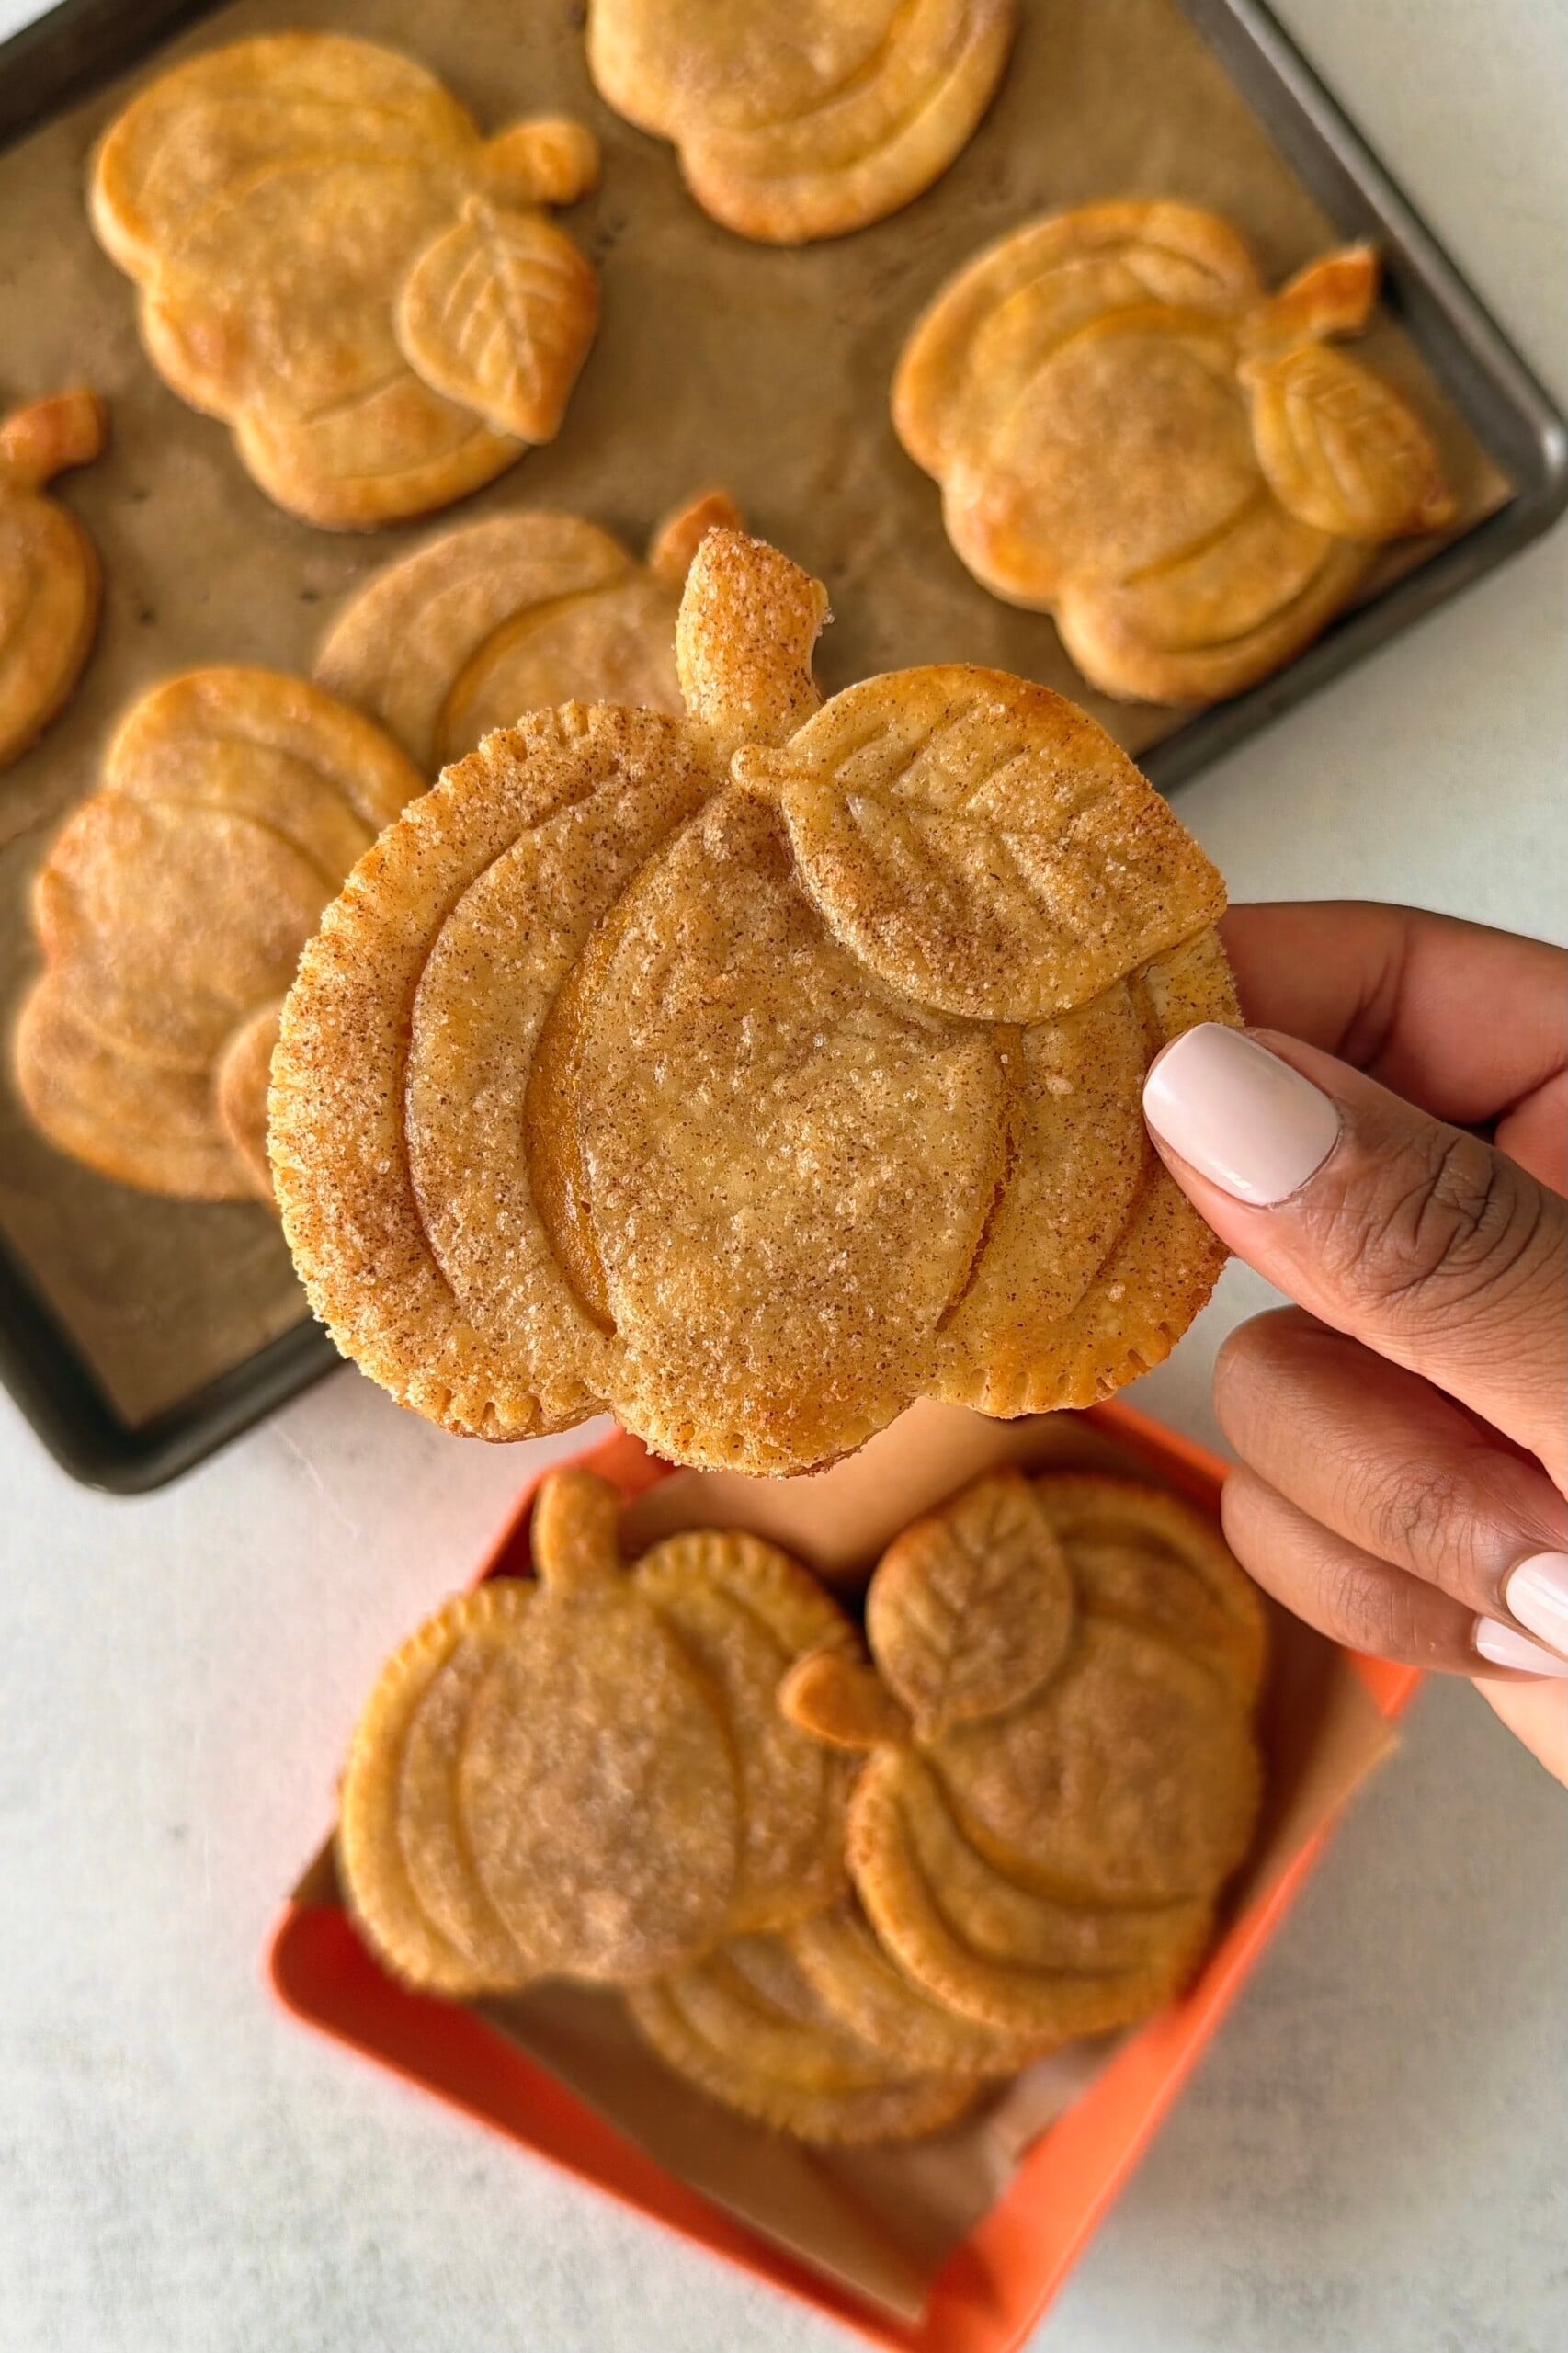
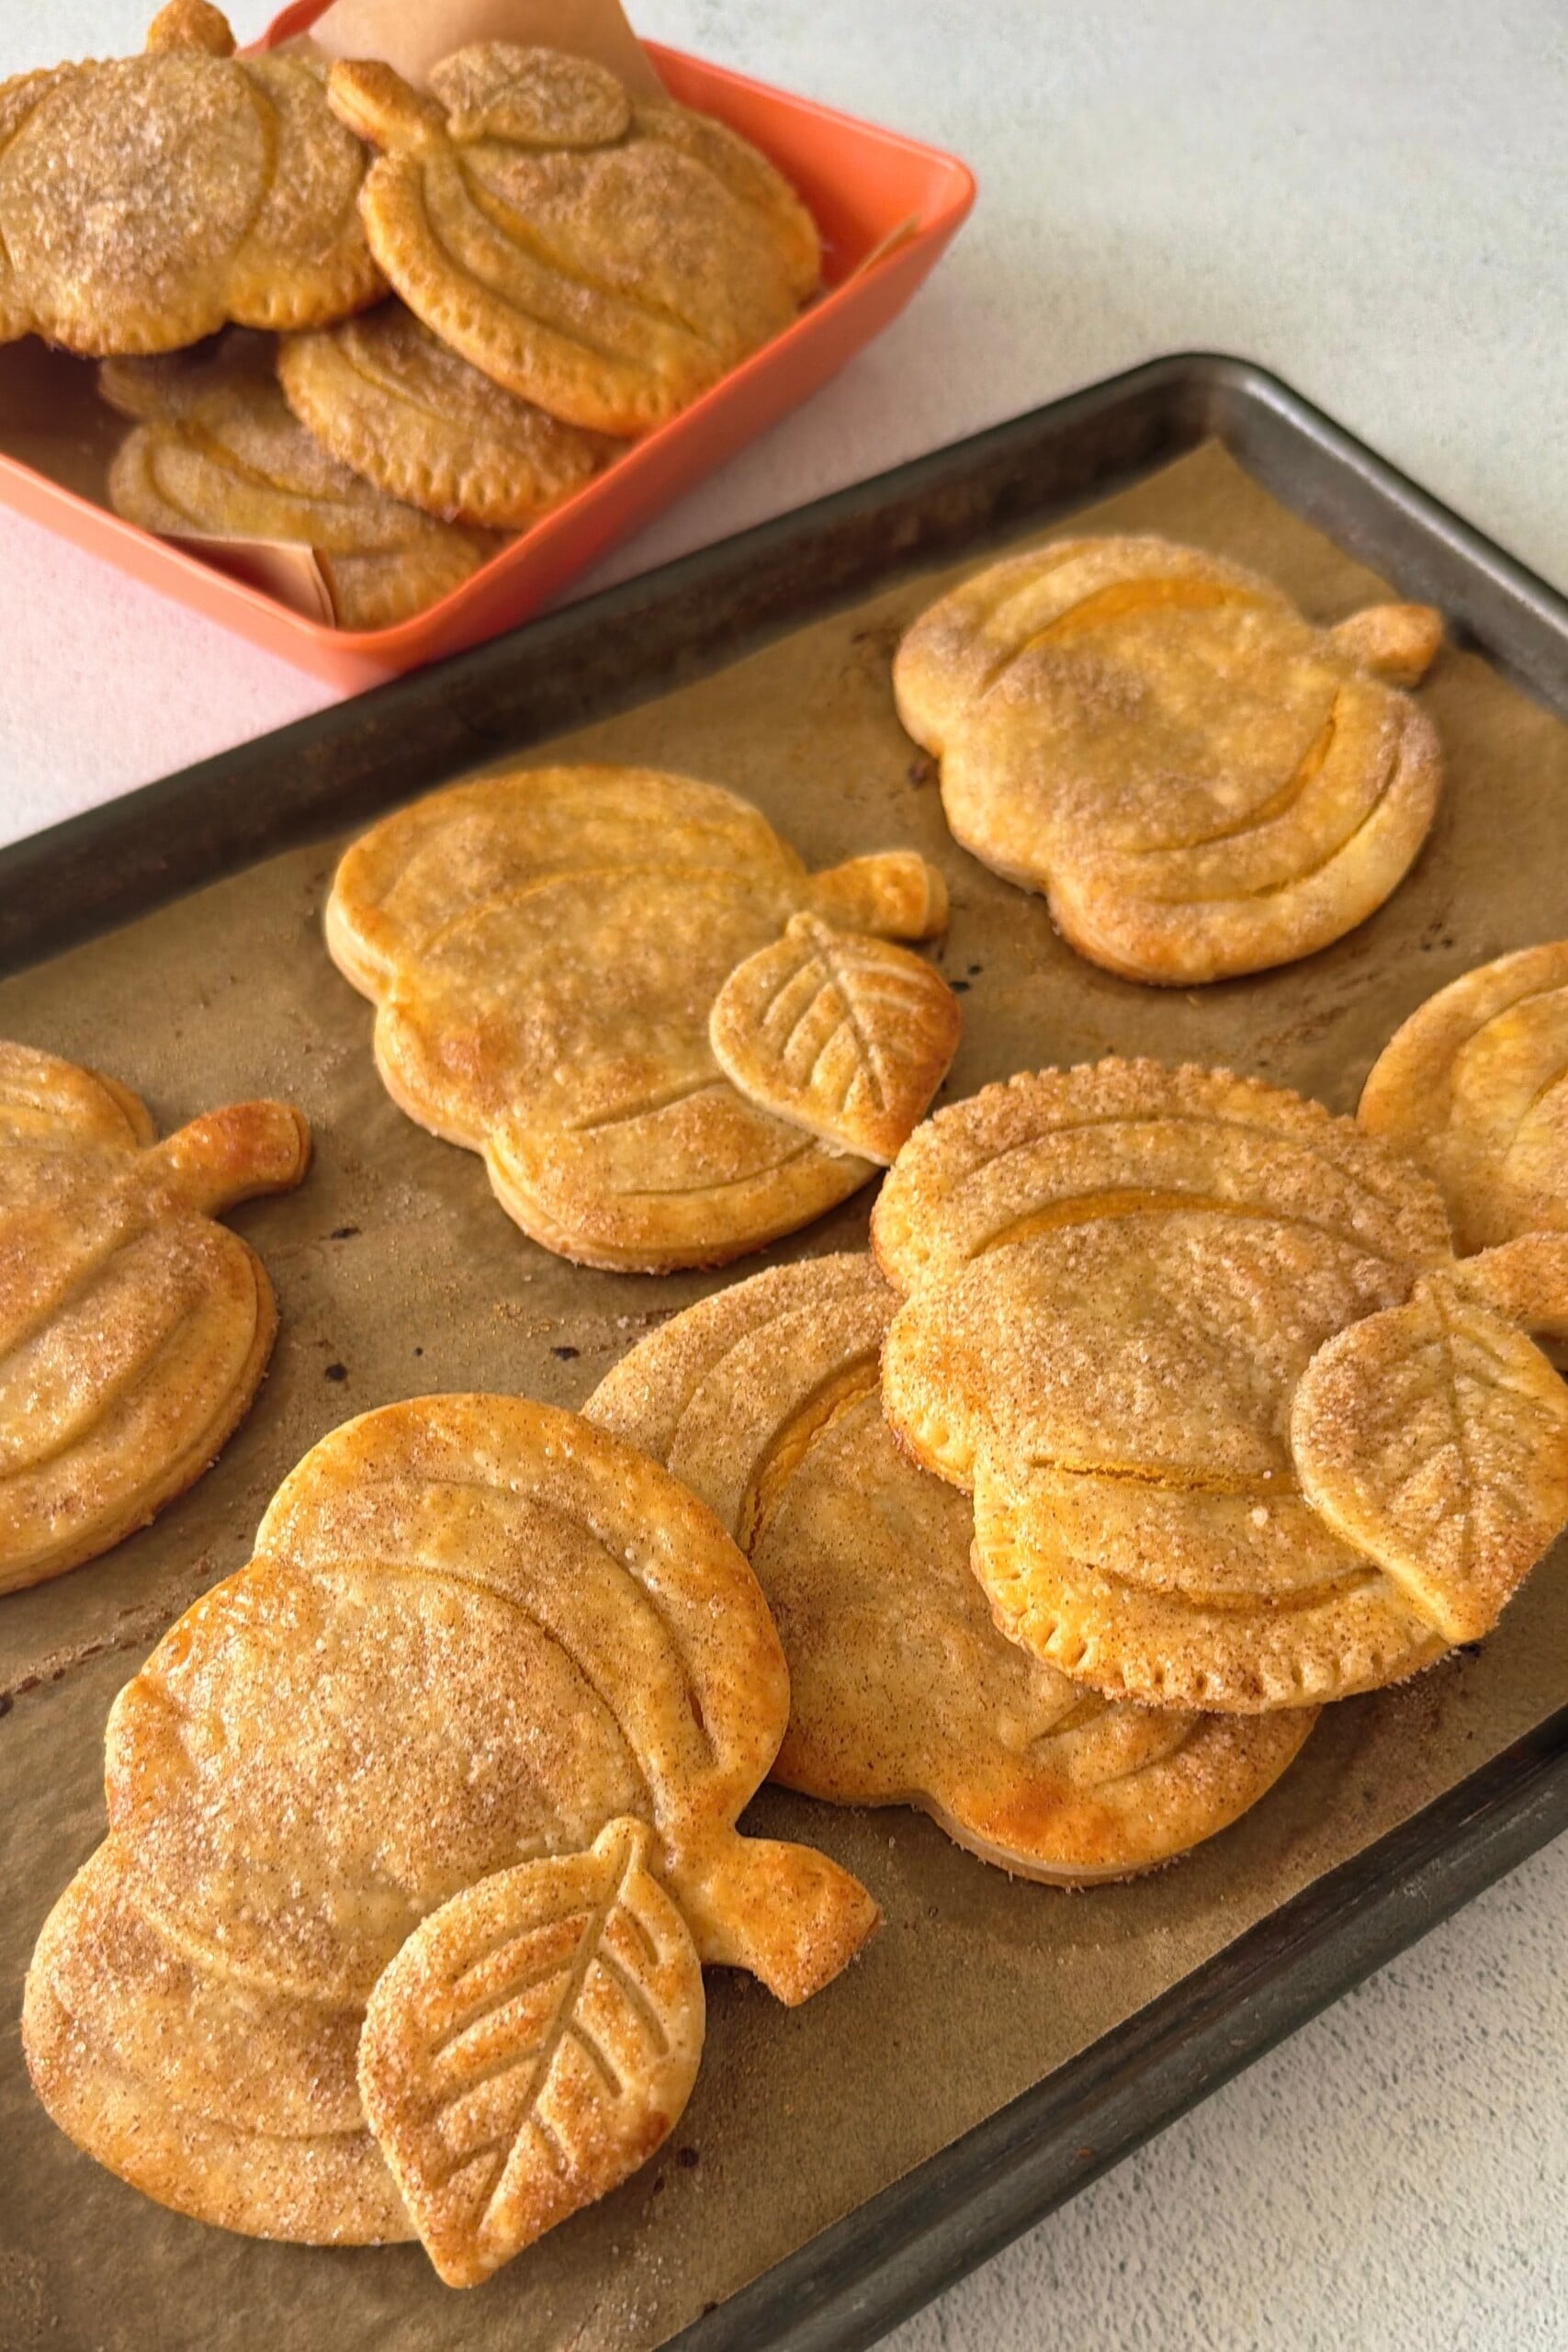
Add as Google preferred sourceThese pumpkin hand pies have a creamy pumpkin filling and are baked until golden and flaky. They’re lightly sweetened with maple syrup, with a little cinnamon sugar on top for an extra sweet touch. All you need is one box of pie crust and a few simple ingredients to make these little fall treats!
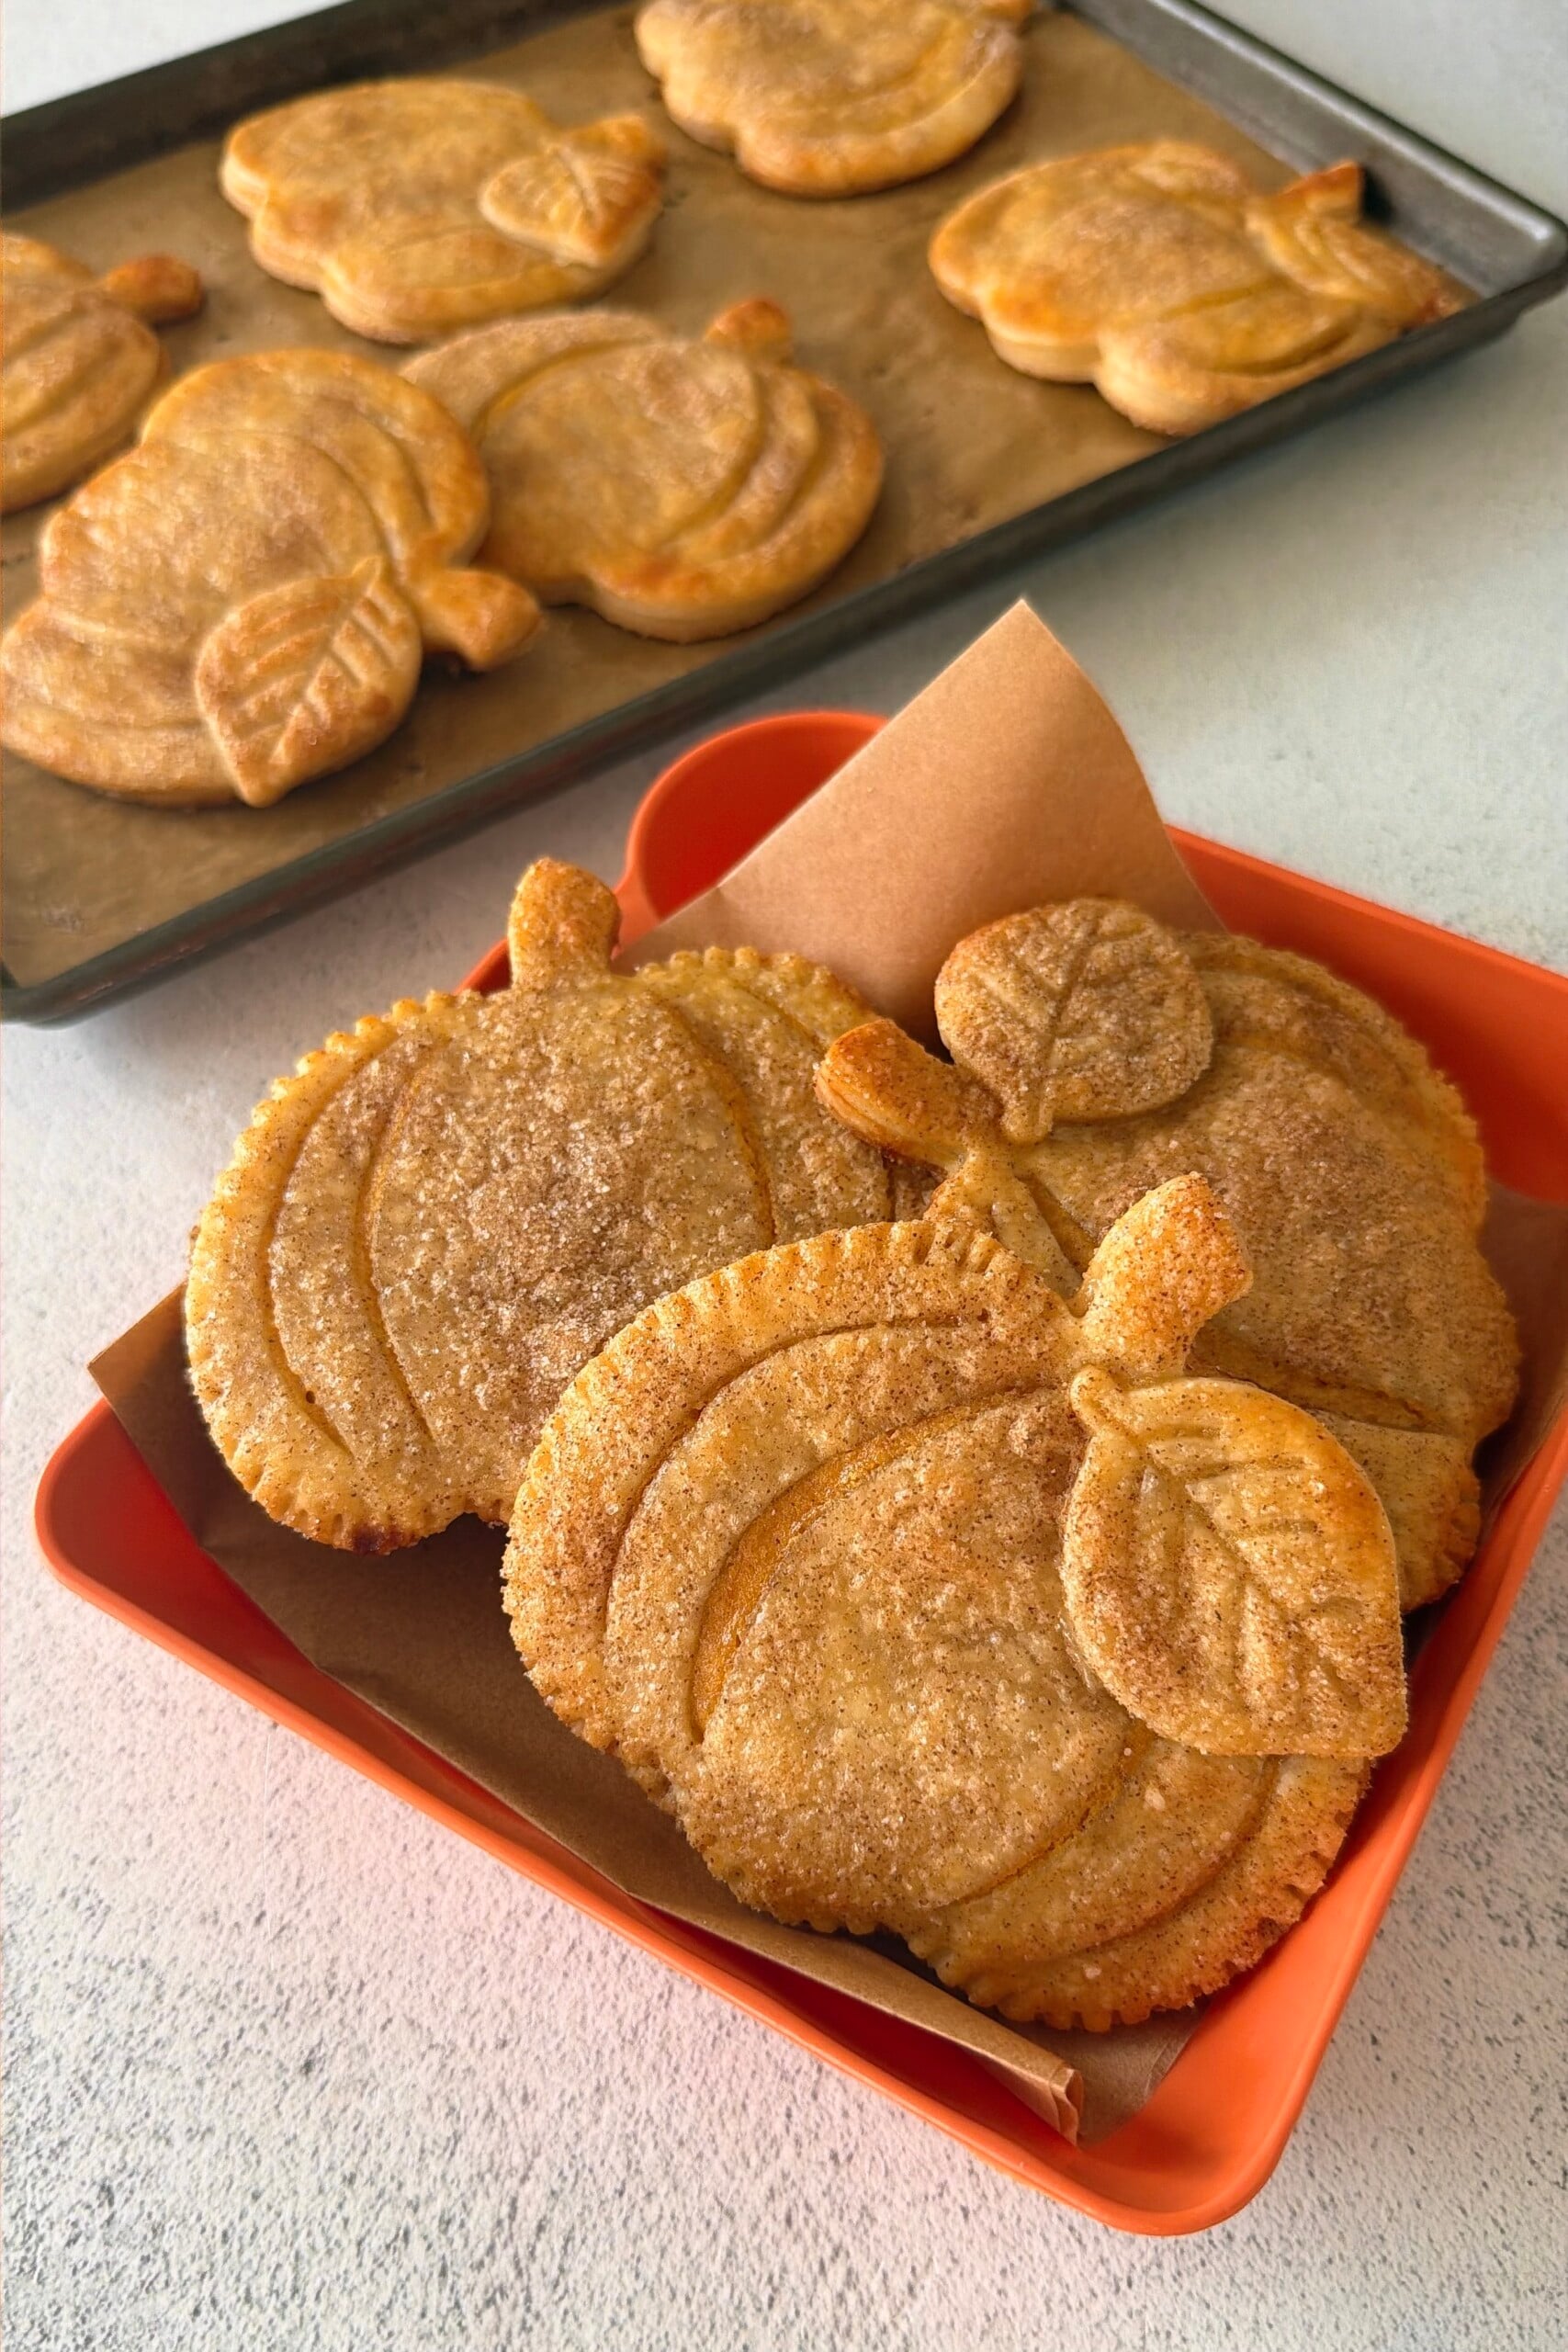
Because everything is cuter when it’s mini, right?! These little pumpkin hand pies are so much fun to make and so simple to put together! I use store-bought pie crust to keep things easy and fill each one with a creamy mixture of pumpkin, cream cheese, and warm pumpkin spice. The pumpkin shapes make them fun and festive, and a little cinnamon sugar on top adds the perfect finishing touch.
Looking for more fun ways to use up leftover pumpkin puree? Try these pumpkin maple muffins or these mini maple-sweetened pumpkin pies! And if you’re more of an apple lover, these apple slice waffles and mini apple hand pies are other fun options for fall!
Table of Contents
What You’ll Need
Here is what you’ll need to make these mini pumpkin hand pies:
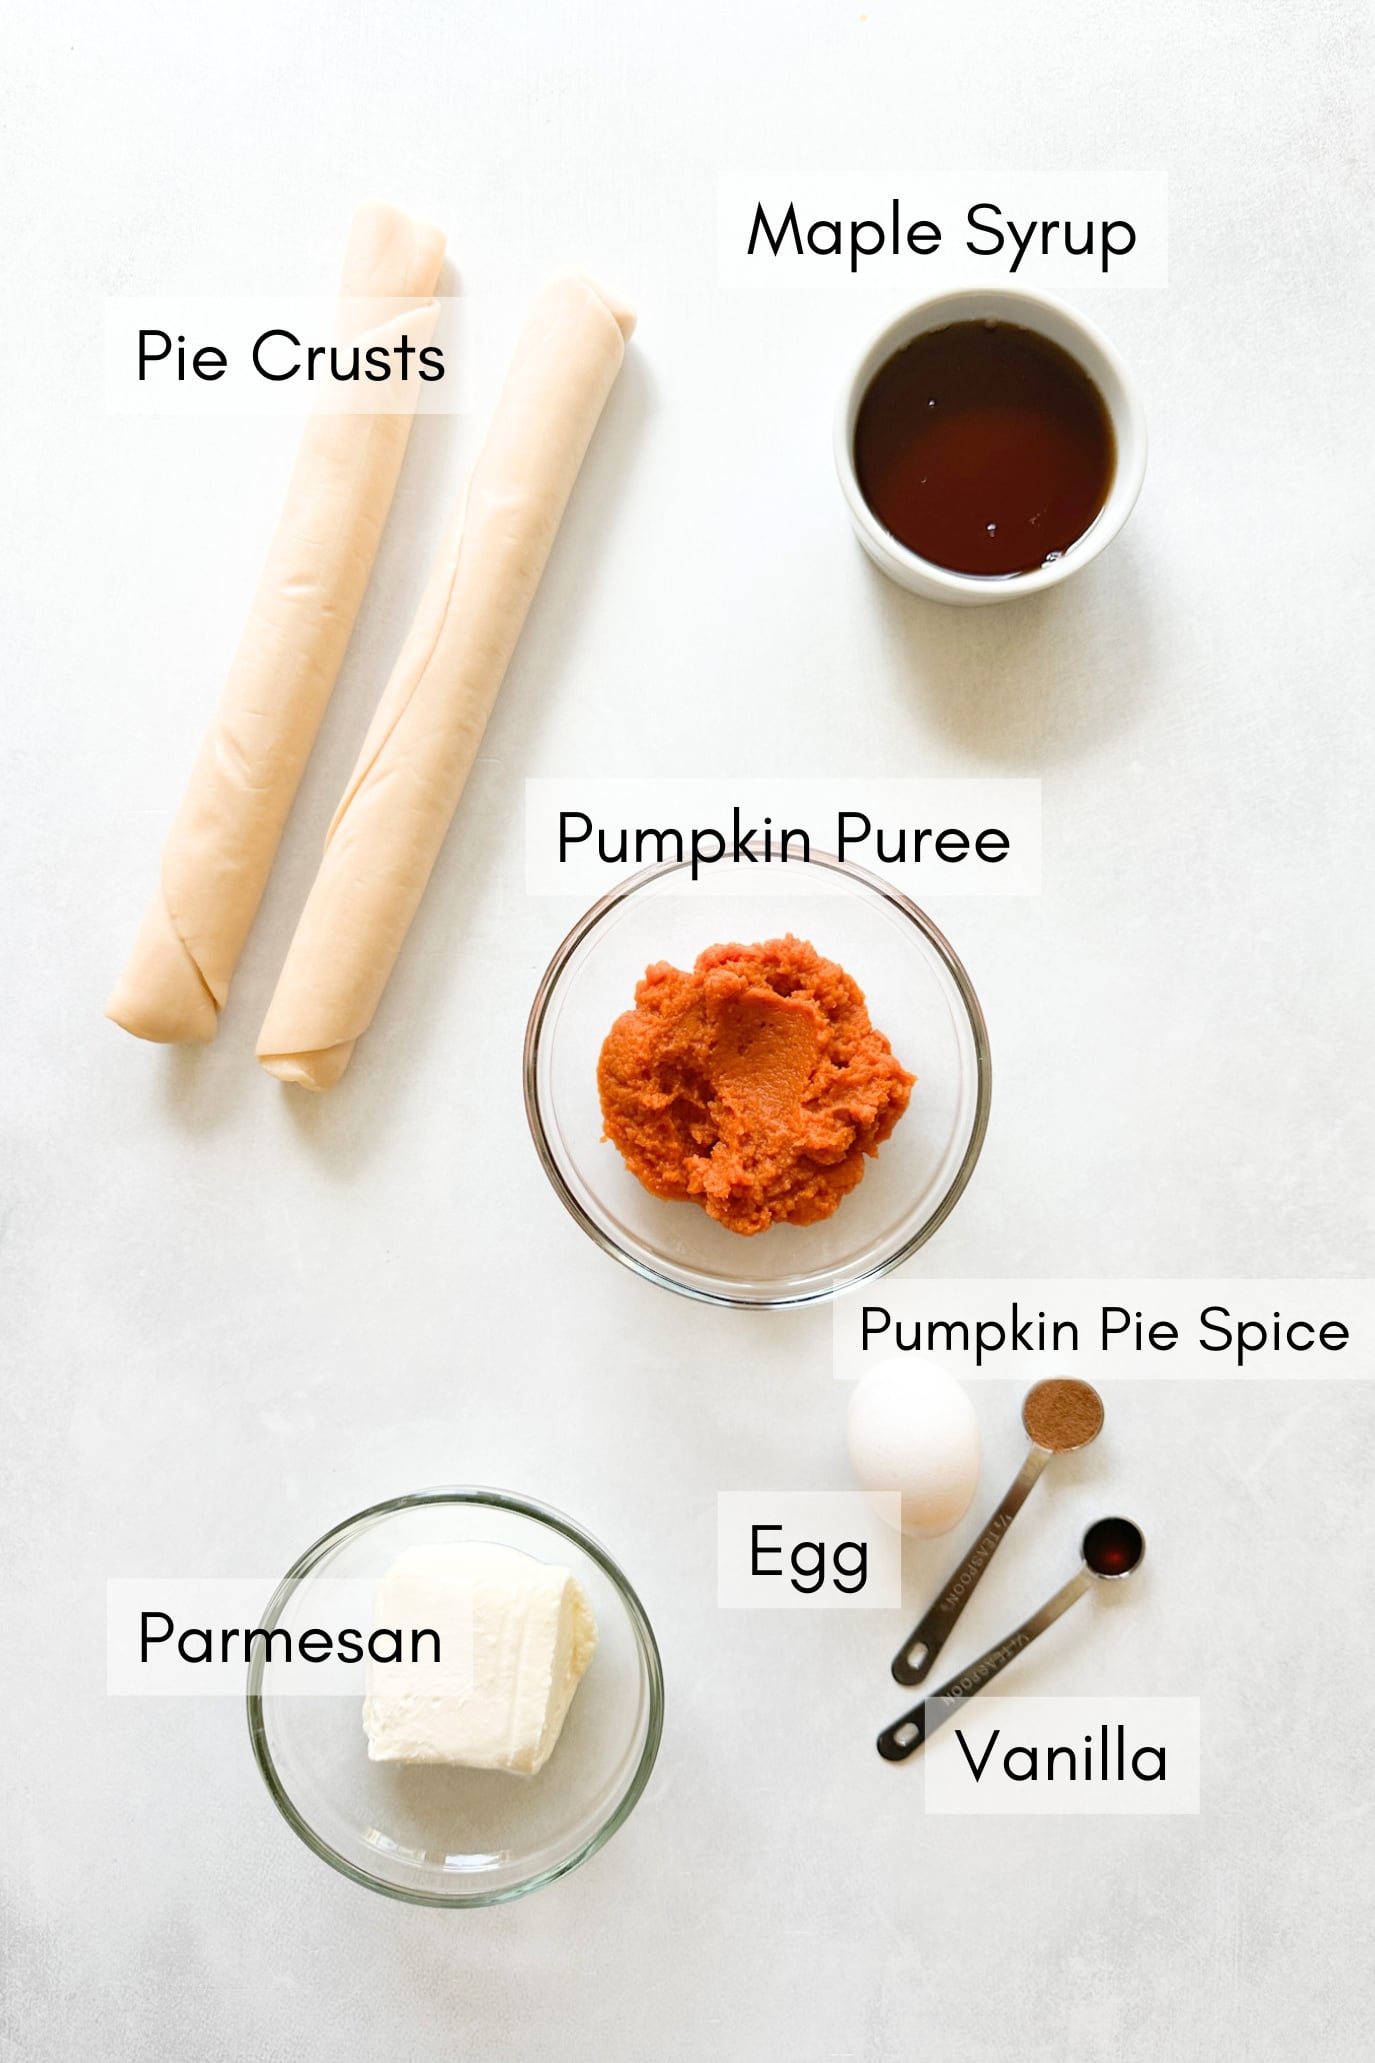
- Pumpkin Puree: Use plain pumpkin puree, not pumpkin pie filling, which already contains sweetener and spices.
- Cream Cheese: Gives the filling a creamy texture and a little cheesecake flavor. Use full-fat block cream cheese if possible and soften it just enough to mix smoothly.
- Maple Syrup: Lightly sweetens the filling.
- Pumpkin Pie Spice: Gives the filling that warm, classic pumpkin spice flavor.
- Vanilla Extract: Adds a little extra flavor to the filling.
- Store-Bought Pie Crust: You’ll need one box containing two refrigerated pie crust rounds.
- Egg: Brushed around the edges to help seal the crusts and over the tops for a golden finish.
- Cinnamon Sugar: Sprinkle a little over the tops before baking for extra sweetness and cinnamon flavor.
See the recipe card below for full information on ingredients and quantities.
Ingredient Substitutions & Additions
- Maple Syrup: You can replace the 2 tablespoons of maple syrup with 2 tablespoons of granulated sugar. This will change the flavor slightly and may make the filling a little thicker since you’re leaving out the liquid syrup.
- Pumpkin Pie Spice: Replace with cinnamon for a simpler flavor, or use cinnamon with a small pinch of nutmeg and ginger.
- Egg Wash: Lightly brush the edges with water or milk to help seal, and brush the tops with milk for an egg-free option. The tops may brown a little differently.
- Cinnamon Sugar: Leave it off for a lightly sweetened option, or sprinkle the tops with coarse turbinado sugar for extra crunch. The filling itself is mildly sweet, so the topping adds a little extra sweetness to each bite.
Step-by-Step Instructions
STEP 1: Preheat the oven to 400°F and line a baking sheet with parchment paper.
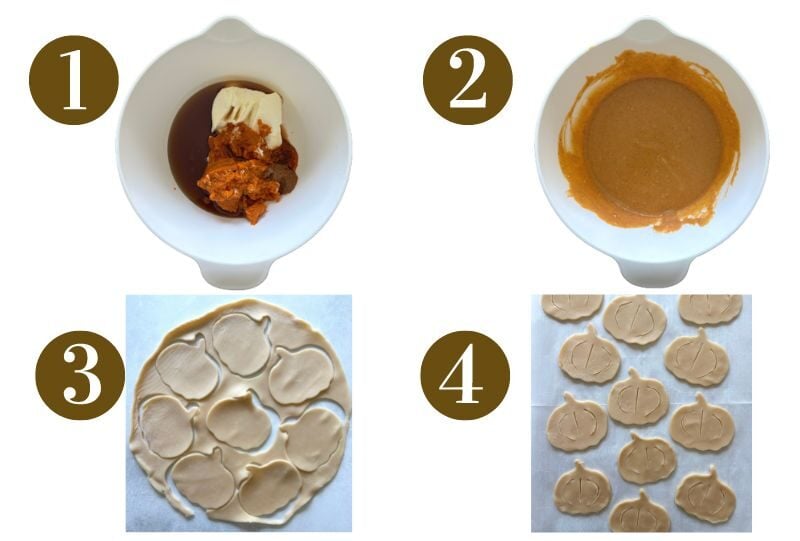
STEP 2: Add the softened cream cheese, pumpkin puree, maple syrup, pumpkin pie spice, vanilla, and cornstarch (if using) to a bowl. Stir until everything is evenly combined and smooth (Images 1 & 2).
STEP 3: Unroll both refrigerated pie crusts onto a lightly floured surface. Use a pumpkin-shaped or round cookie cutter to cut out as many shapes as possible (Image 3). Gather and gently reroll the scraps to cut additional shapes, keeping the dough close to its original thickness. With half of the pumpkin pie cutouts, use a knife to slice slits to resemble pumpkin ridges (Image 4).
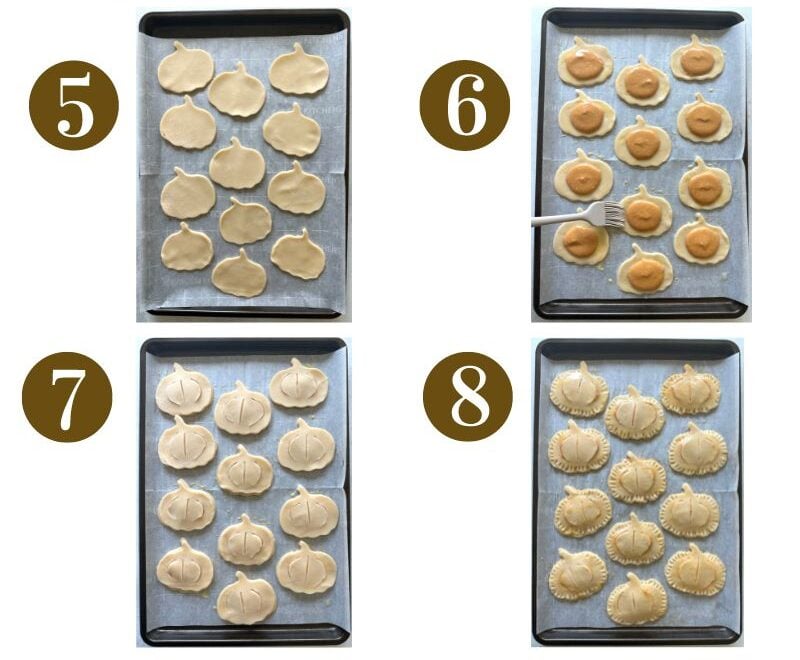
STEP 4: Place the solid cutouts onto the prepared baking sheet. Spoon about a tablespoon of filling (or as much as you can fit) into the center of each bottom crust, leaving a border around the edges (Images 5 & 6).
STEP 5: Beat the egg in a small bowl. Lightly brush the borders with beaten egg (Image 6). Then place those top cutouts over the filling (Image 7). Gently press around the filling to seal and crimp the edges with a fork for extra help sealing (Image 8).
STEP 6: Lightly brush the tops with beaten egg and sprinkle with cinnamon sugar, if desired, and bake for about 12 to 15 minutes, or until the tops and bottoms are golden brown and the crust is cooked through. Let the pies cool before serving.
Storage Instructions
Store leftover pumpkin hand pies in an airtight container in the refrigerator for up to 4 days. Refrigerate within 2 hours of baking. For the best texture, reheat them in the oven or air fryer at 325°F for a few minutes until warmed through, and the crust becomes crisp again. You can also microwave, but the crust will be softer. To freeze, let the baked pies cool, then place them in a single layer on a baking sheet and freeze until firm. Transfer to a freezer-safe bag or container and freeze for up to 3 months. Thaw overnight in the refrigerator and reheat before serving.
Tips For Success
- Make the most of the crust. Cut the shapes close together, then gently gather and reroll the scraps. Avoid adding too much flour or repeatedly working the dough, which can make the crust tough.
- Don’t overfill the pies. You want enough filling so that you can taste it in the pies, but not too much so that it spills out on the edges. This filling is pretty loose in texture, so try to keep it in the center.
- I highly recommend adding the cinnamon sugar on top! The filling is only lightly sweetened, so the topping adds a little extra sweetness to balance the flaky crust. If you’re serving to a young child, you can leave it off and serve the pies plain or with whipped cream.
- Cornstarch is optional, but it helps thicken the filling as the pies bake, so it holds together a little better.
Recipe FAQs
Yes! Homemade pie crust works just as well. Roll it out to about ⅛-inch thickness before cutting out your shapes. Keep in mind that the baking time may vary slightly depending on the thickness of your dough.
Not at all! A round cutter works well, too. You can also cut the dough into small rectangles with a knife. Adjust the amount of filling so there’s enough room around the edges to seal each pie.
These pies are lightly sweetened with maple syrup and have a mild pumpkin cheesecake flavor. For sweeter pies, sprinkle cinnamon sugar or coarse brown sugar over the egg-washed tops before baking.
More Pumpkin Recipes You’ll Love

Mini Maple Sweetened Pumpkin Pies
Pumpkin Maple Muffins

Pumpkin Waffles

Pumpkin Yogurt (Yogurt Bark And Yogurt Melts)
If you tried these Pumpkin Maple Pies, please leave a ⭐ star rating and let me know how it went in the comments below! I love hearing from you!
Pumpkin Hand Pies
Ingredients
For Pumpkin Hand Pies
- 1 box refrigerated pie crust, containing 2 rolls
- 2 oz full-fat block cream cheese, softened, 4 tbsp or ¼ cup
- ¼ cup pumpkin puree
- 2 tbsp maple syrup
- ¼ tsp pumpkin pie spice
- ¼ tsp vanilla extract
- 1 tsp cornstarch, optional to help thicken the filling during baking
- 1 egg, for optional egg wash
For Cinnamon Sugar Coating
- 1 tbsp granulated sugar
- ¼ tsp ground cinnamon
Instructions
- Preheat the oven to 400 degrees F (204 degrees C).
- Allow the pie crusts to come to room temperature as you prepare the filling mixture.
- Add the softened cream cheese, pumpkin puree, maple syrup, pumpkin pie spice, vanilla, and cornstarch (if using) to a bowl. Stir until everything is evenly combined and smooth.
- Unroll both refrigerated pie crusts onto a lightly floured surface. Use a pumpkin-shaped or round cookie cutter to cut out as many shapes as possible. Gather and gently reroll the scraps to cut additional shapes, keeping the dough close to its original thickness. With half of the pumpkin pie cutouts, use a knife to slice slits to resemble pumpkin ridges
- Place the solid cutouts onto the prepared baking sheet. Spoon about a tablespoon of filling (or as much as you can fit) into the center of each bottom crust, leaving a border around the edges.
- Beat the egg in a small bowl. Lightly brush the borders with beaten egg. Then place those top cutouts over the filling. Gently press around the filling to seal and crimp the edges with a fork for extra help sealing.
- Lightly brush the tops with beaten egg and sprinkle with cinnamon sugar, if desired, and bake for about 12 to 15 minutes, or until the tops and bottoms are golden brown and the crust is cooked through. Let the pies cool before serving.
Notes
- If you prefer a thicker filling, you can replace the 2 tablespoons of maple syrup with 2 to 3 tablespoons of granulated sugar. This reduces the added liquid while keeping the filling sweet.
- Make the most of the crust. Cut the shapes close together, then gently gather and reroll the scraps. Avoid adding too much flour or repeatedly working the dough, which can make the crust tough.
- Don’t overfill the pies. You want enough filling so that you can taste it in the pies, but not too much so that it spills out on the edges. This filling is pretty loose in texture, so try to keep it in the center.
- I highly recommend adding the cinnamon sugar on top! The filling is only lightly sweetened, so the topping adds a little extra sweetness to balance the flaky crust. If you’re serving to a young child, you can leave it off and serve the pies plain or with whipped cream.
- Cornstarch is optional, but it helps thicken the filling as the pies bake, so it holds together a little better.







These are SO DELICIOUS! And my 3 year old had so much fun making them with me. I couldnt find my pumpkin shaped cookie cutter so we did hearts, but they are just as cute! We will absolutely make again.
I’m so glad to hear that you enjoyed them, Lauren!😊
Had a great time making this with my two and nine year old kids. Tastes great and very festive. We added whipped cream as well. Yum!
I’m so glad to hear that you enjoyed them, Krystal!😊
I followed this recipe to the T except I subbed out the filling and used a homemade berry jam. They were a HIT with the family. Thanks for the inspo Lily.
I’m so glad to hear that you enjoyed these, Cristina!😊