
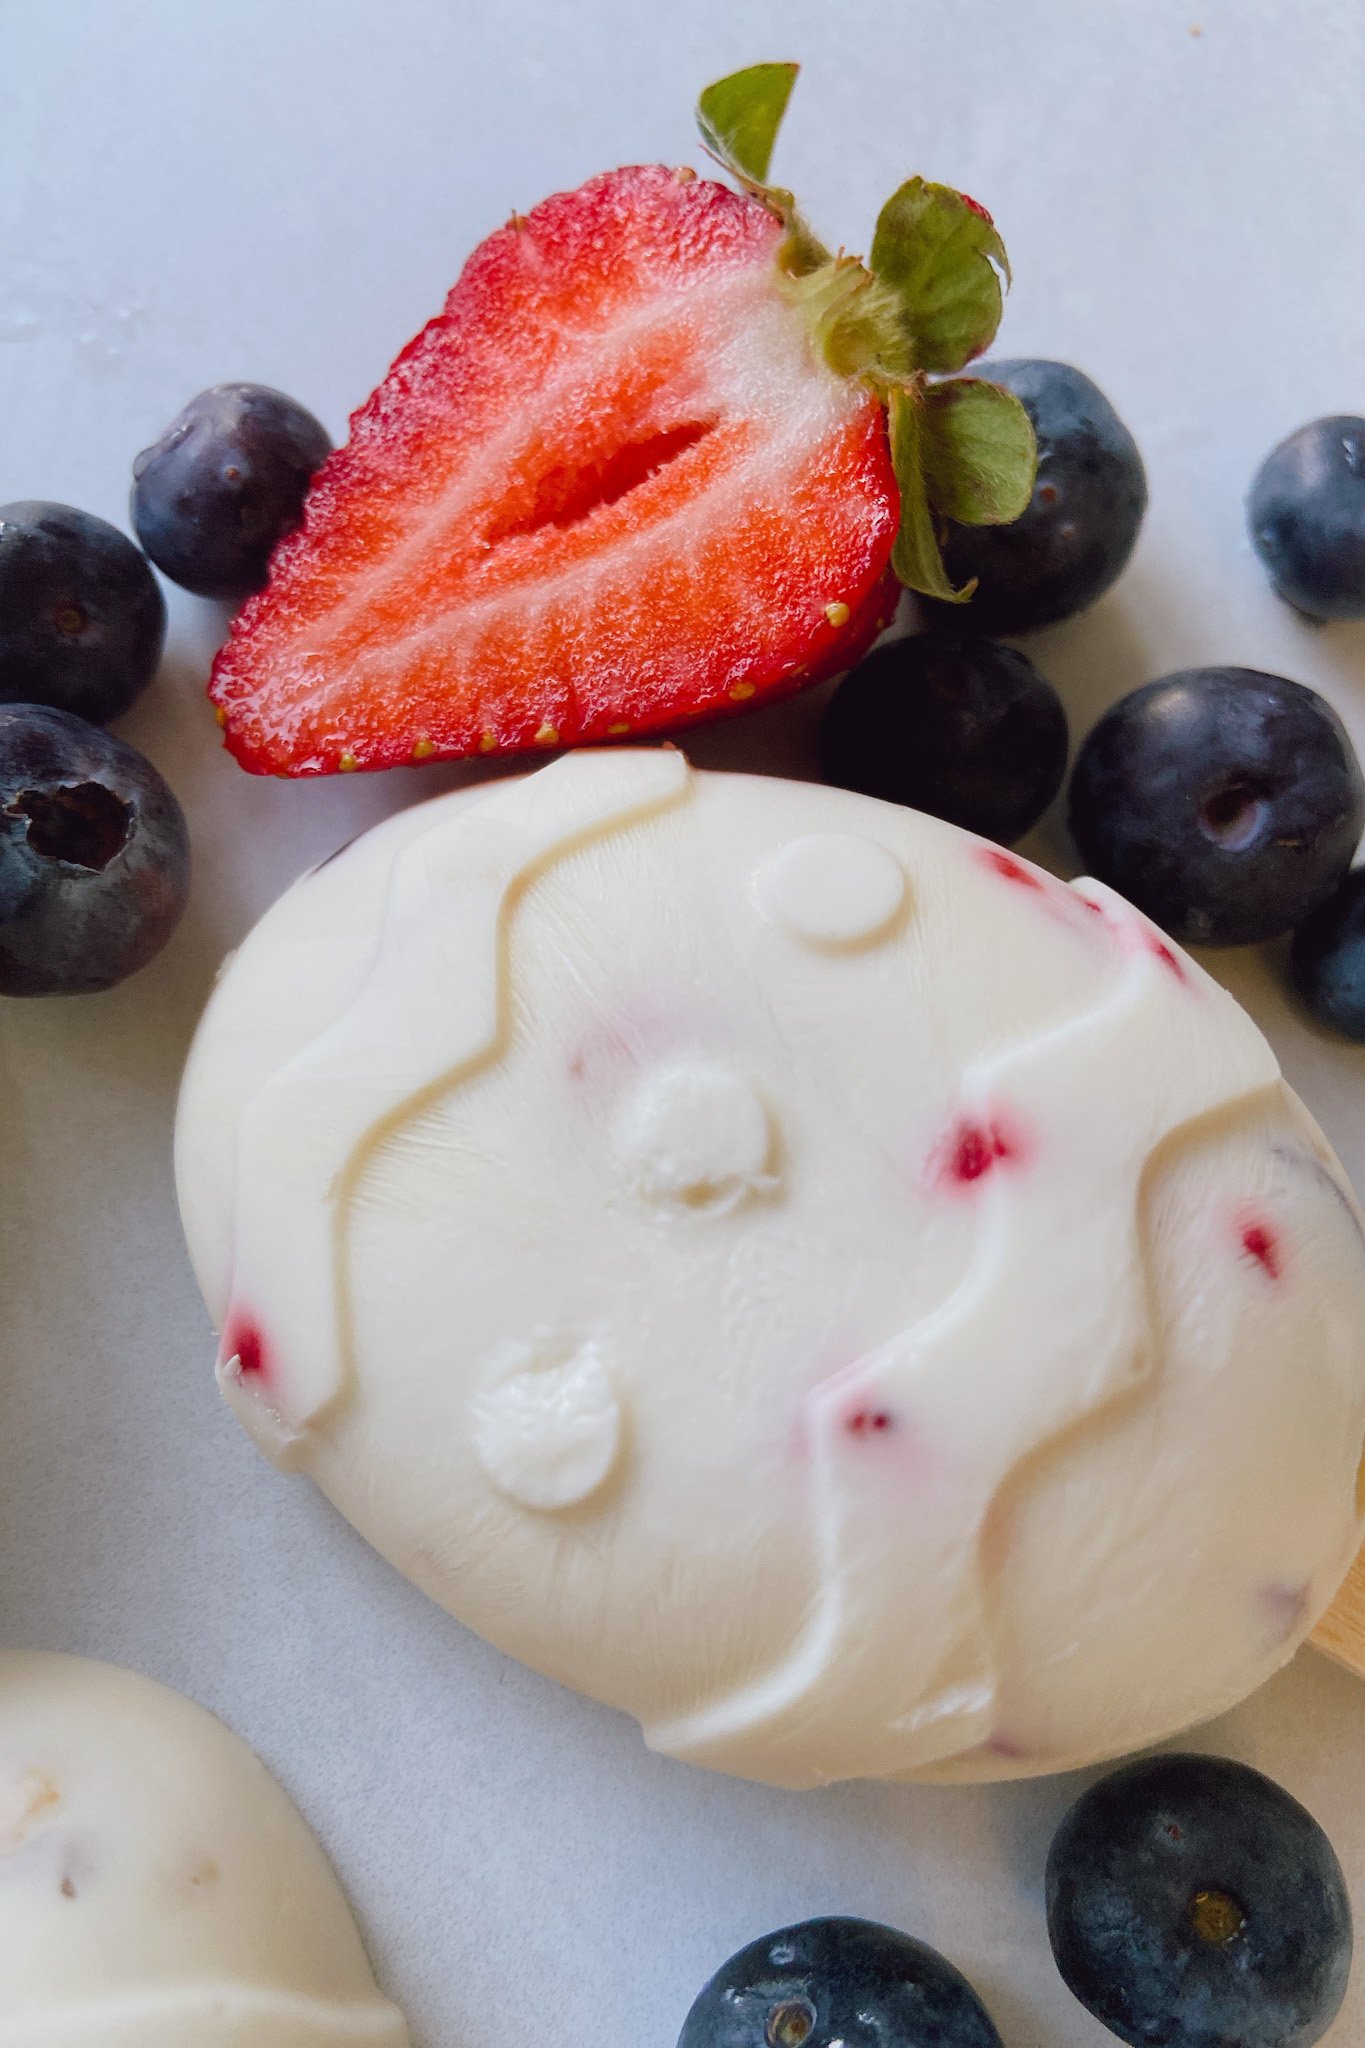
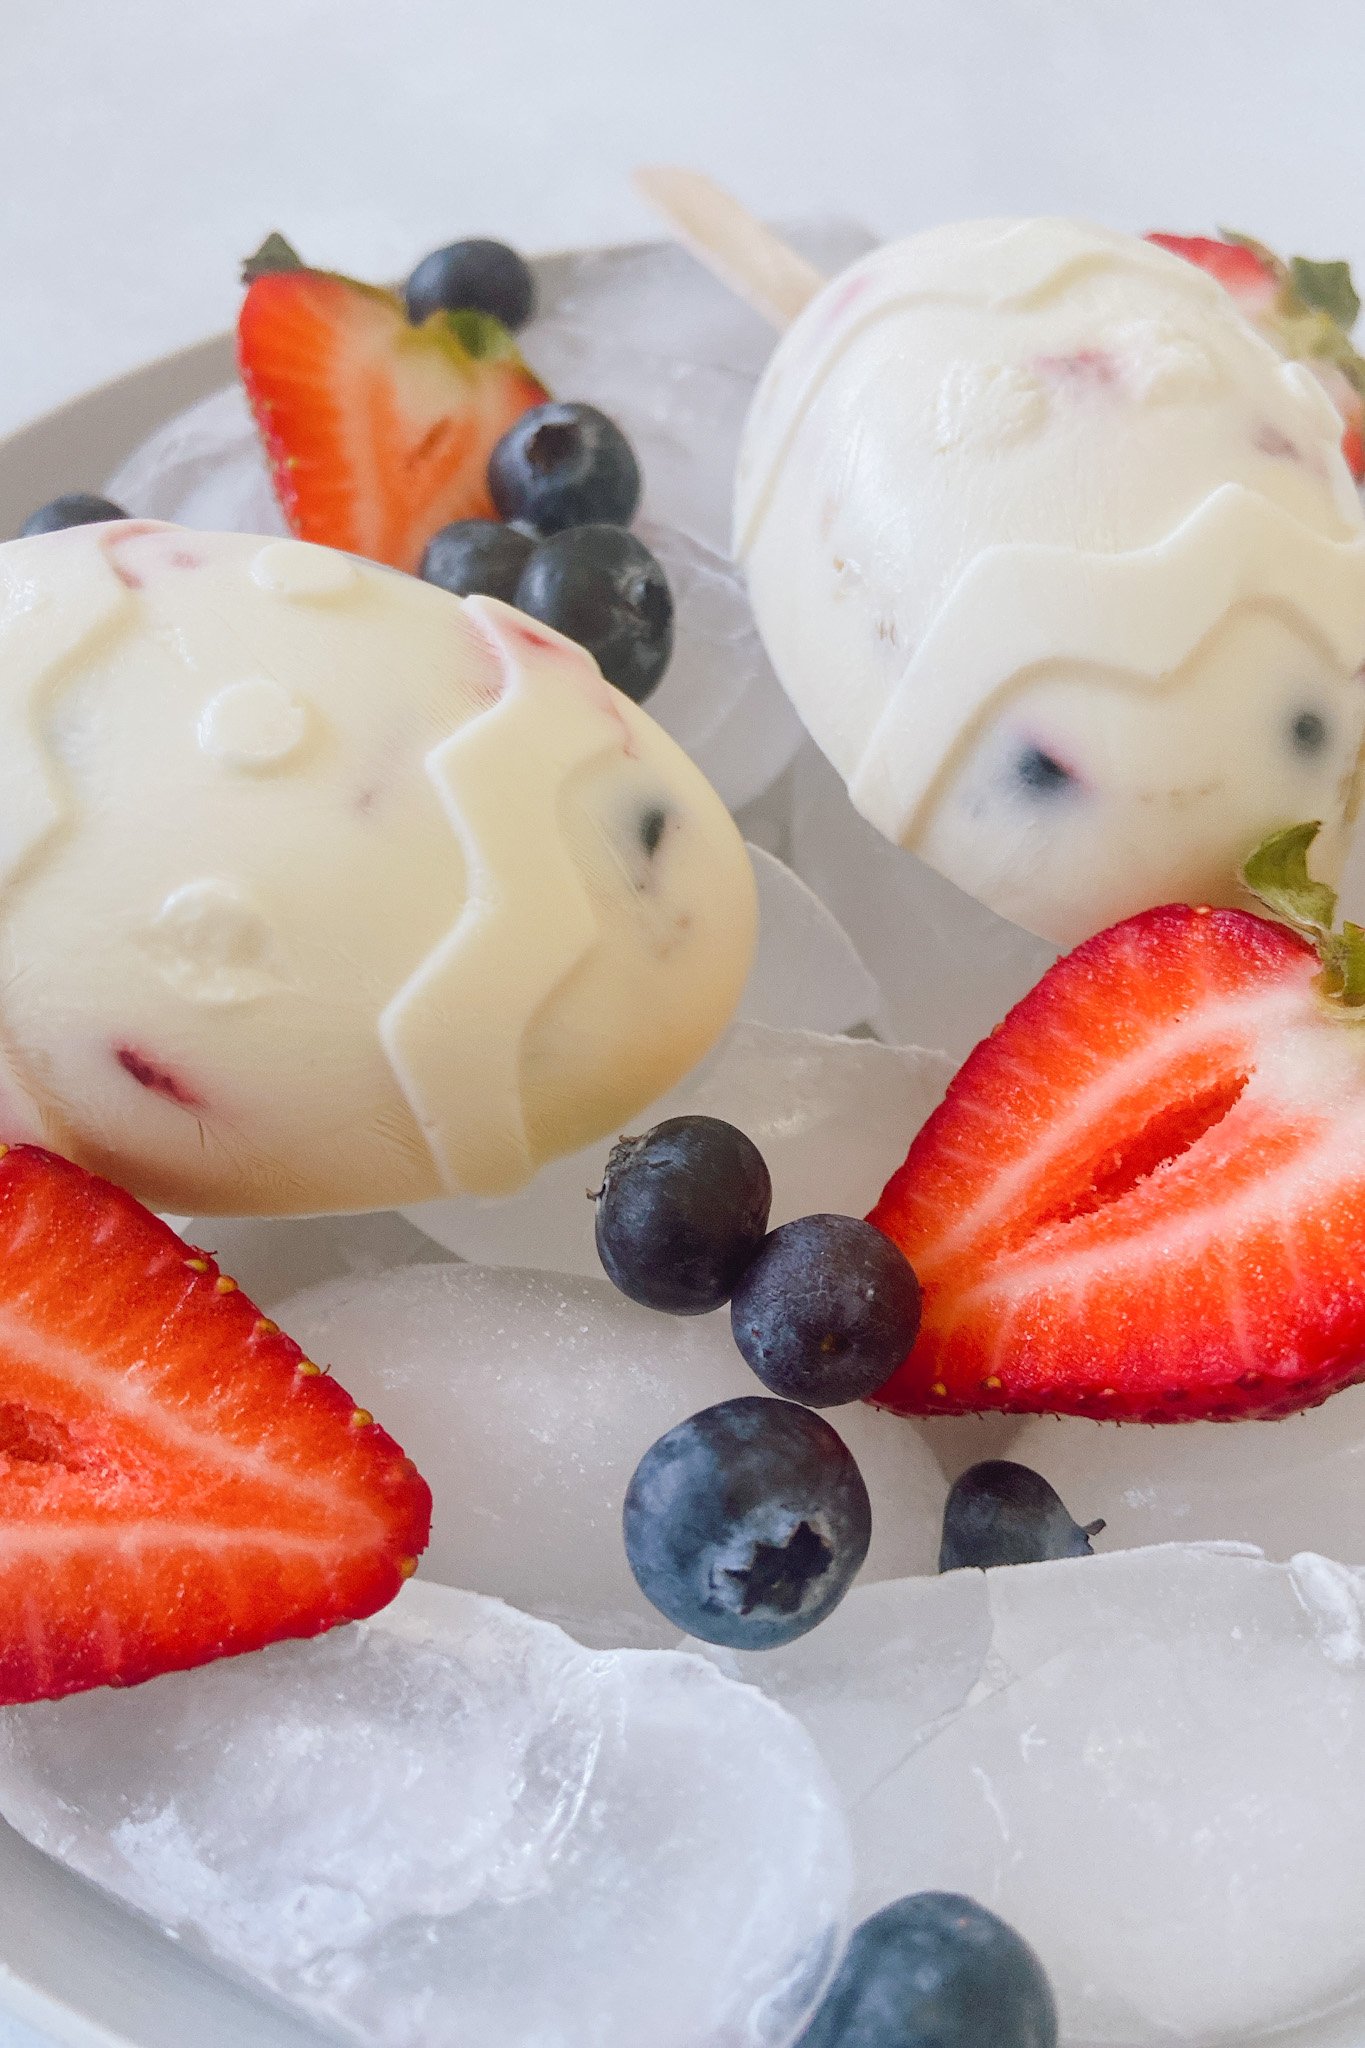
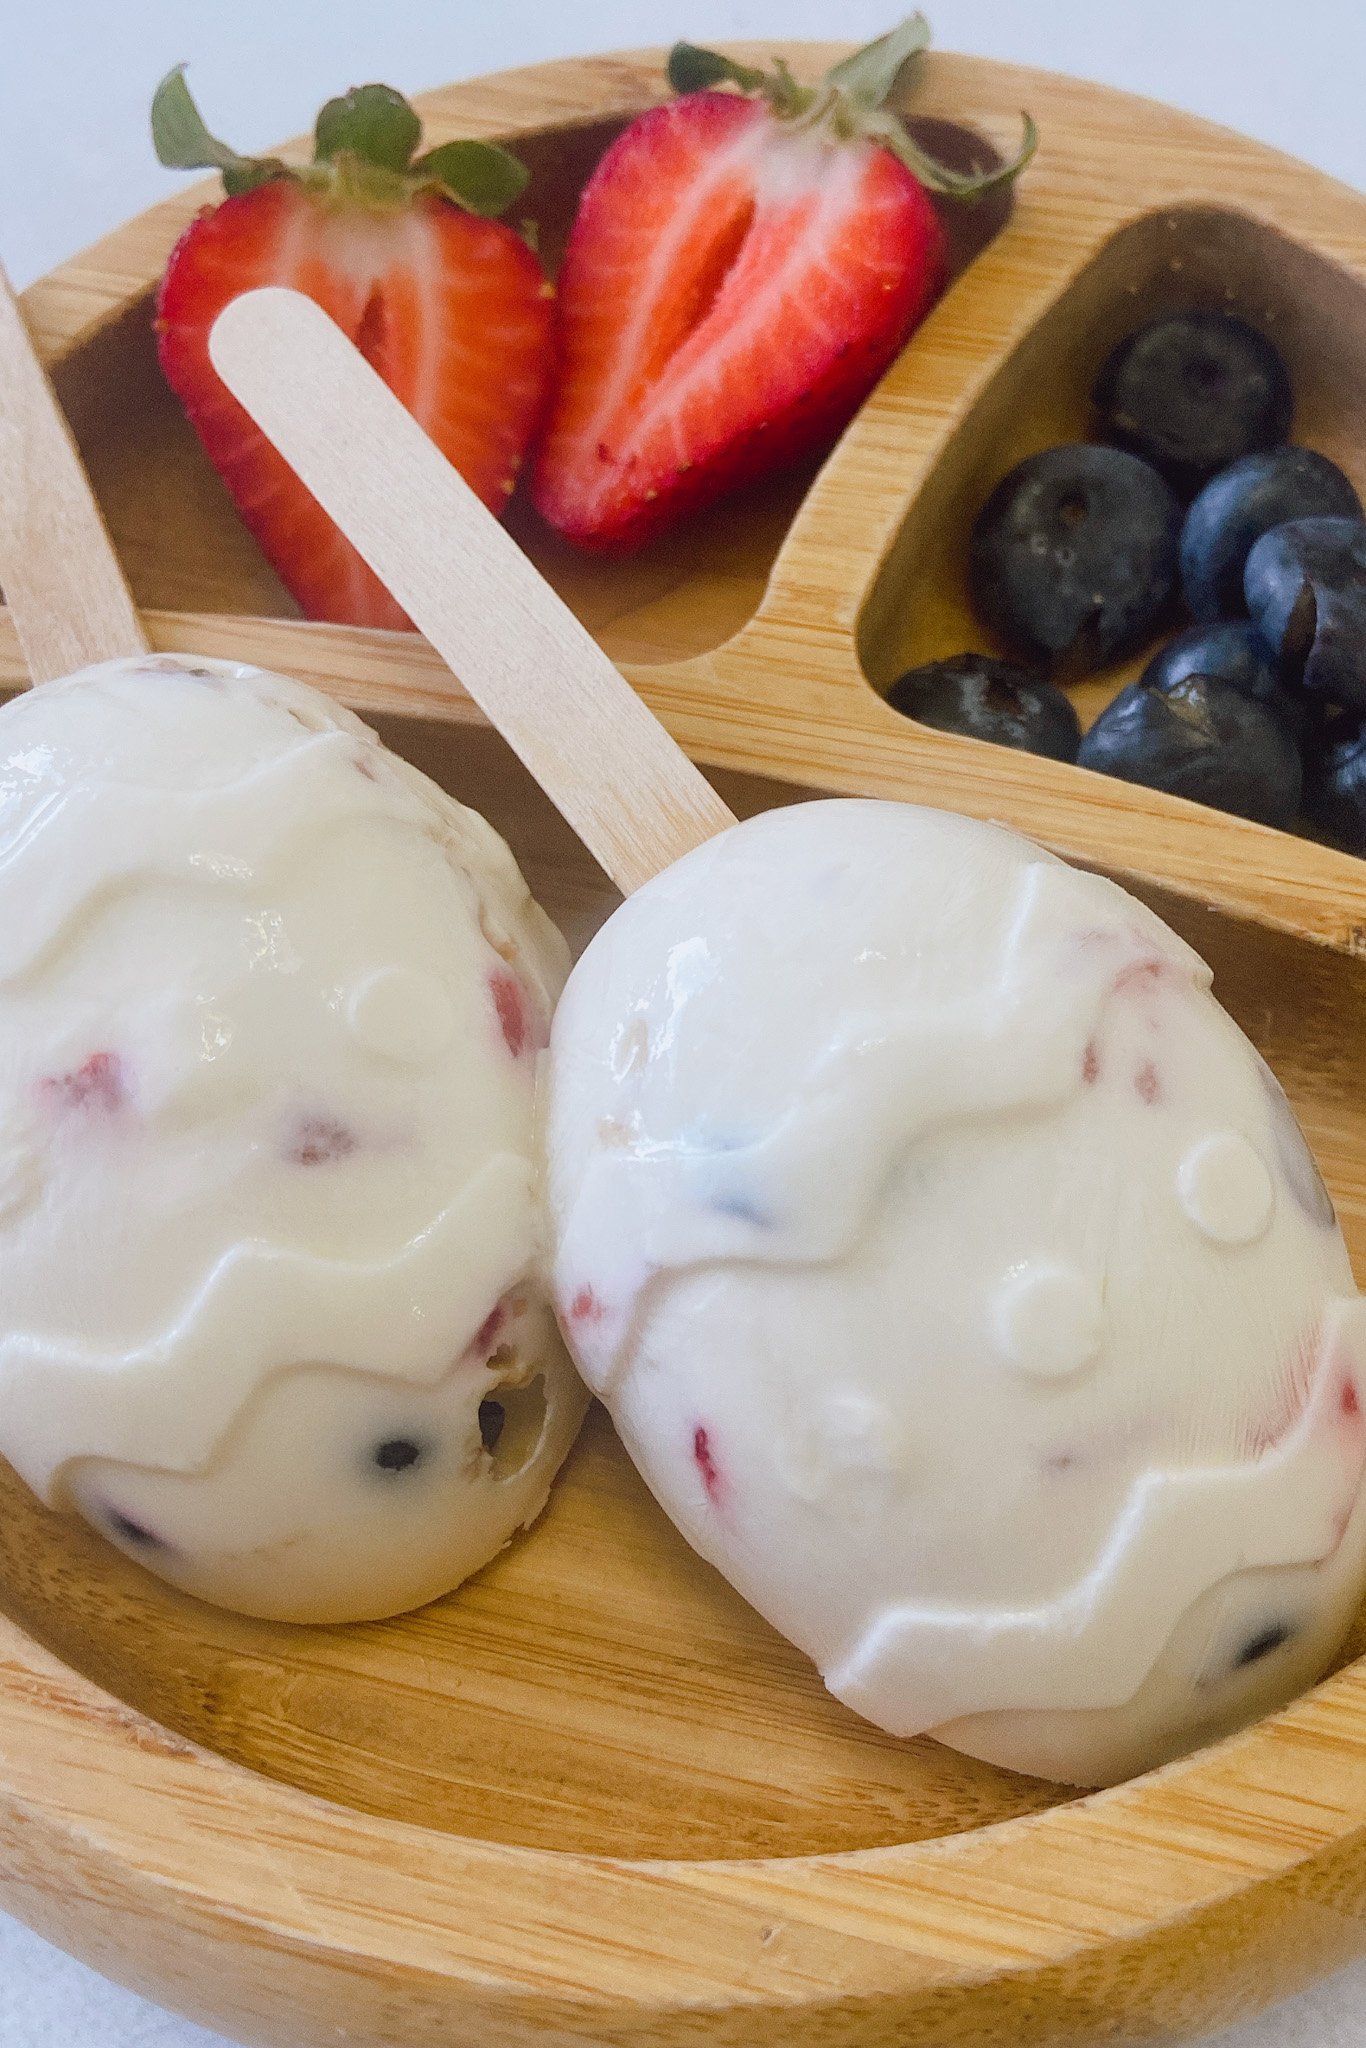
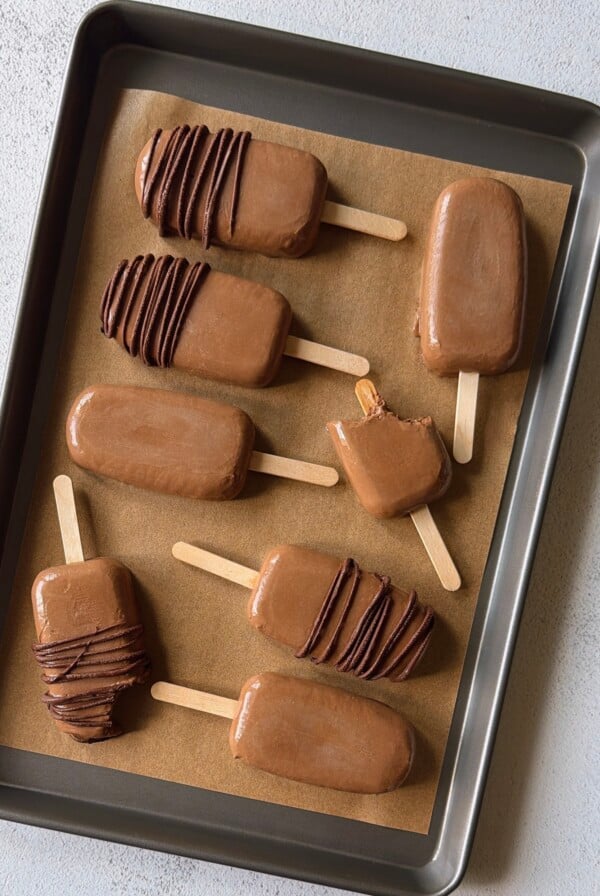
Easter Egg Greek Yogurt Popsicles
on Apr 13, 2022
This post may contain affiliate links. Please read our disclosure policy.
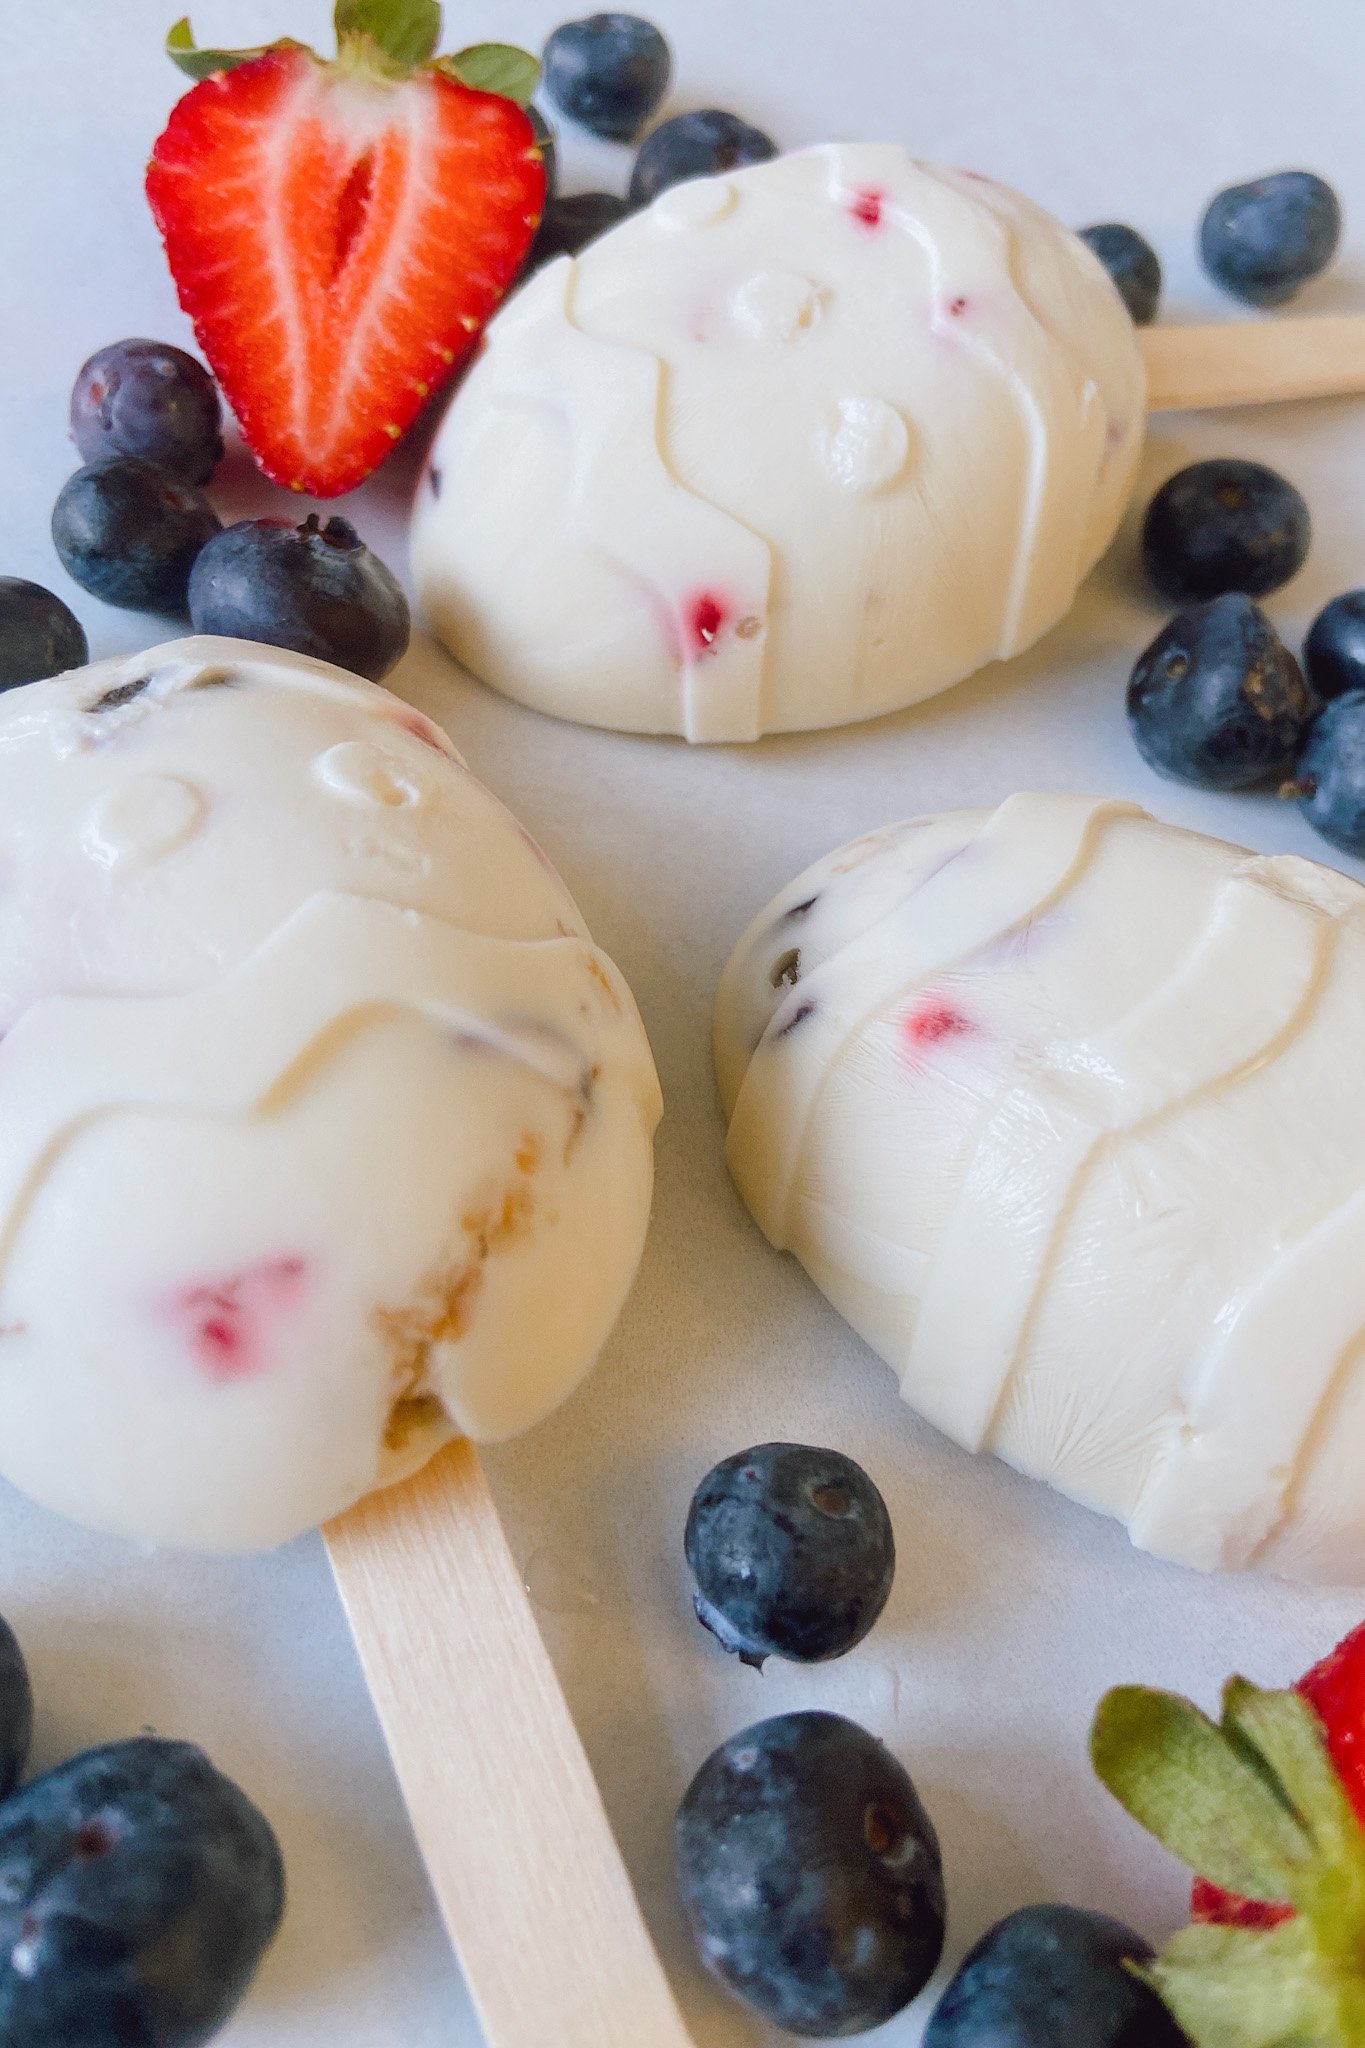
These Greek yogurt popsicles are a simple fun way to serve an Easter-themed snack in a simple to make frozen treat!
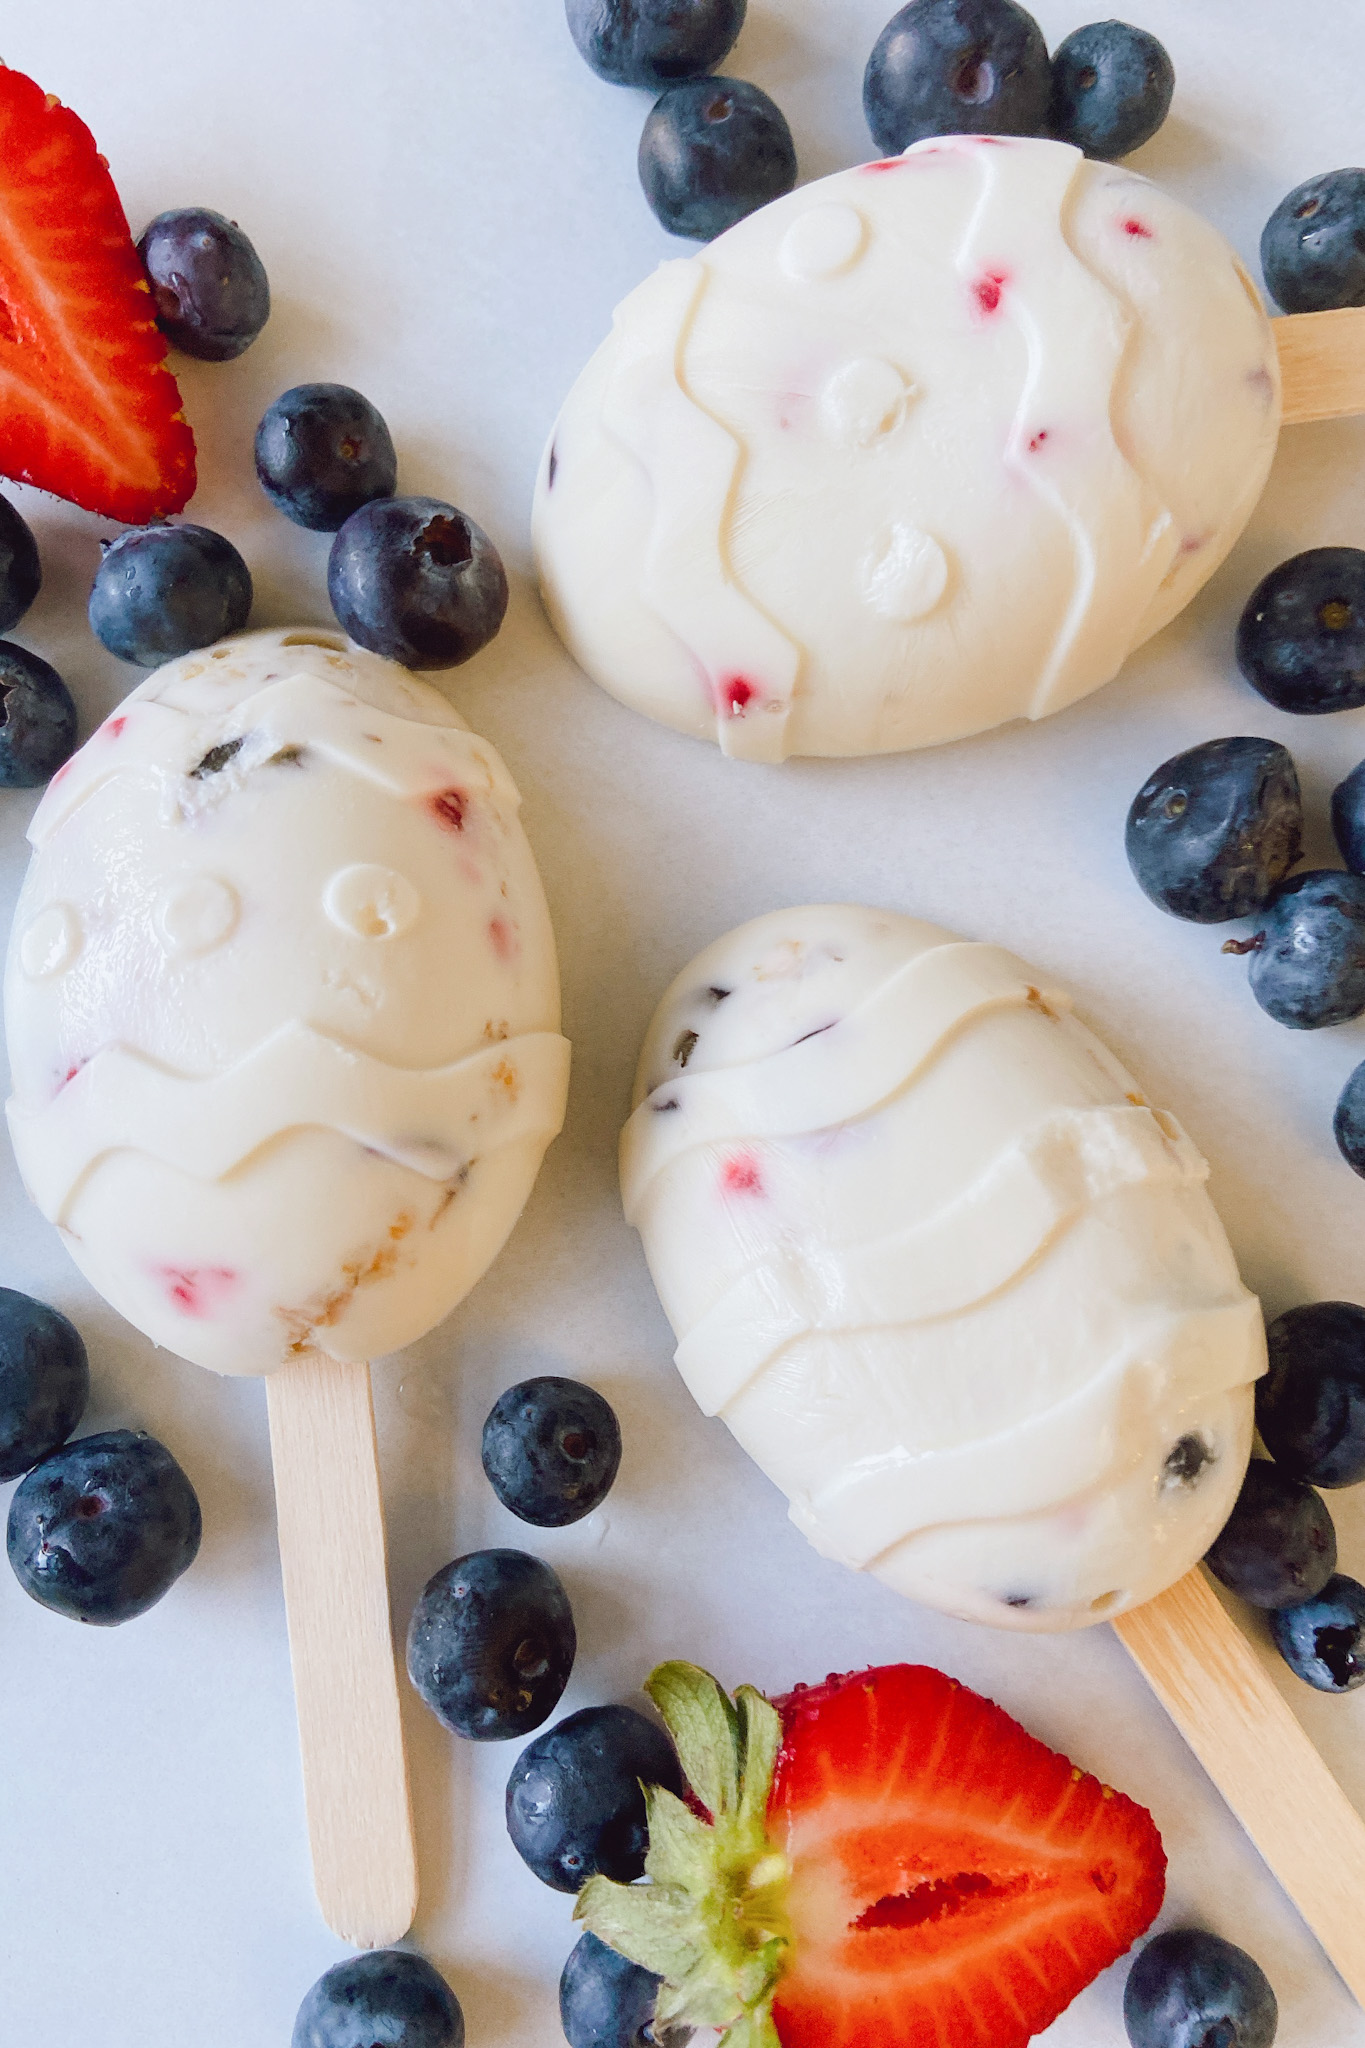
These Greek yogurt popsicles share similar ingredients to the refreshing frozen yogurt bark recipe. An easter egg silicone mold is used to form the shape and base of the yogurt pops, but you can use any mold you have on hand! They are a perfect treat for a hot sunny day!
WHAT YOU’LL NEED
Here is what you’ll need to make these easter egg Greek yogurt popsicles:
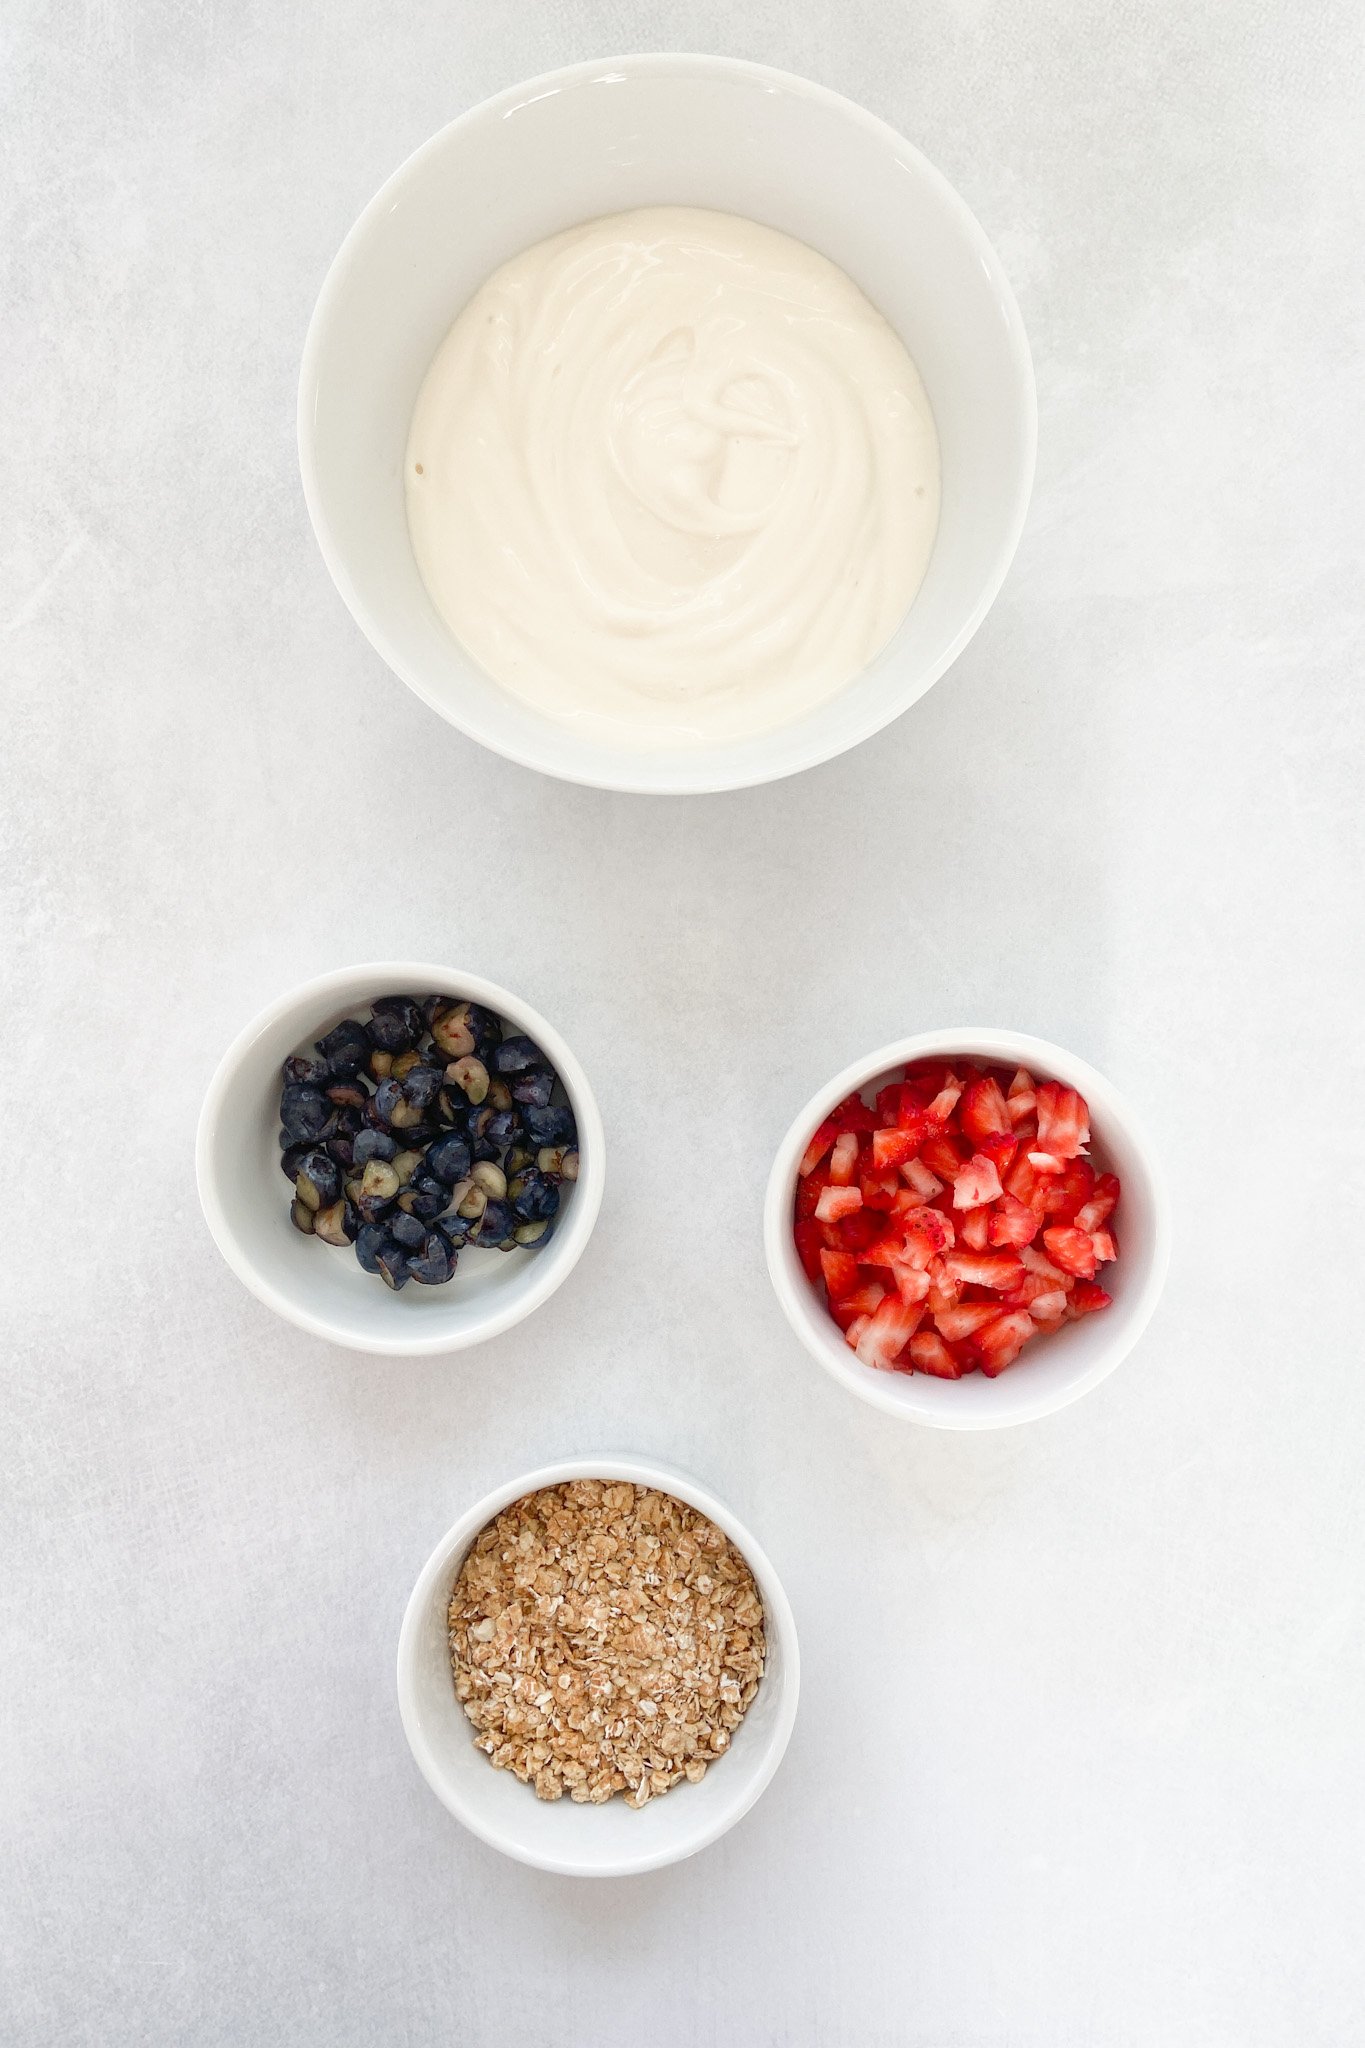
- Greek Yogurt: The main star ingredient for these popsicles. Greek yogurt is naturally thick and great to help the pops hold their shape. I stirred in a little maple syrup to plain Greek yogurt for some added sweetness, but you can use any type of yogurt you have on hand!
- Berries: I used diced strawberries and quartered blueberries in these pops, but any type of berries works well.
- Granola: For added flavor and a little crunch!
PROCESS
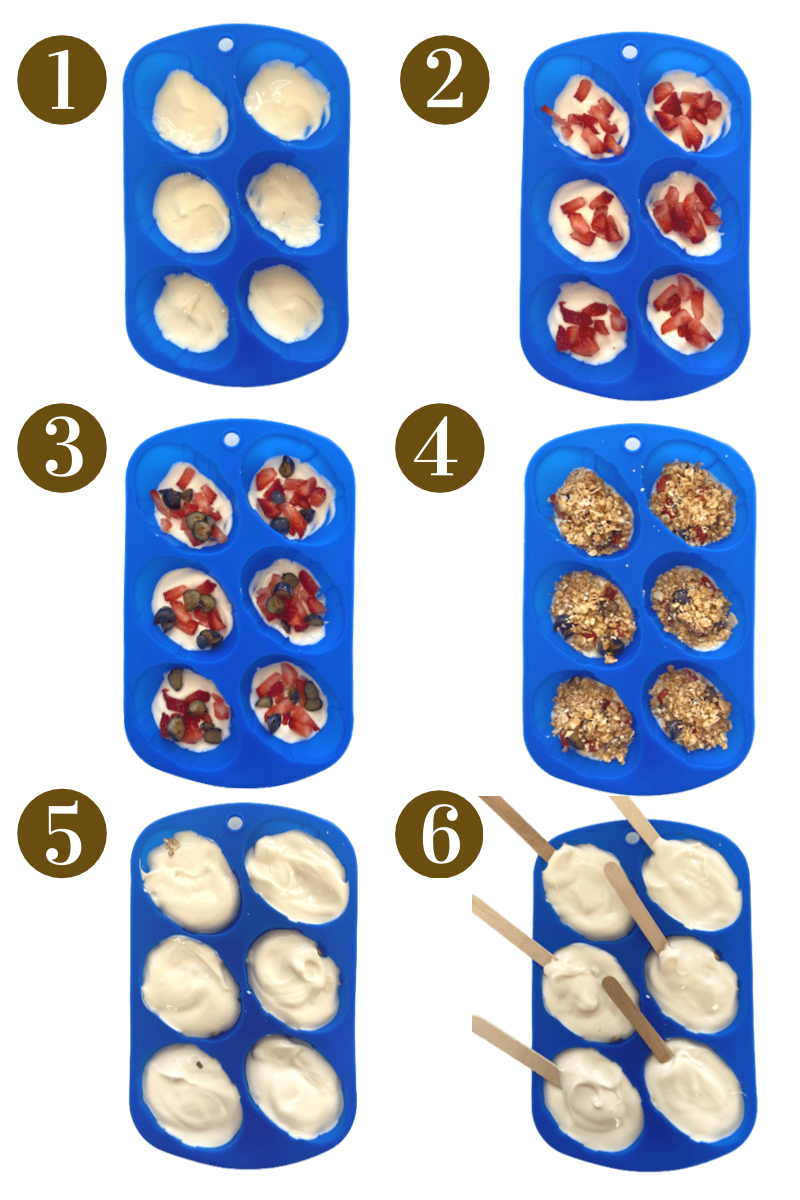
- Place a small amount of yogurt at the bottom of your silicone pan.
- Layer in the chopped berries, granola, and any other toppings of choice.
- Scoop in another tablespoon or so of yogurt until each mold is filled and the toppings are fully covered.
- Stick in the popsicle sticks at an angle as far as they can go without sticking out too much.
- Spoon a little more yogurt over the popsicle indentation to help secure the popsicle stick.
- Place the mold on a baking pan and freeze for at least 2 hours.
TOPPING ALTERNATIVES FOR YOGURT POPSICLES
Here are some other topping ideas for the yogurt popsicles!
- Chopped berries
- Chopped mangoes/pineapple
- Crushed granola
- Ground nuts
- Shredded coconut
- Drizzled peanut butter
- Crushed freeze-dried fruits
- Flax seeds/Chia seeds (for added nutrition!)
STORAGE INSTRUCTIONS
Once the Greek yogurt popsicles harden for at least 2 hours, remove them from the silicone molds and transfer them to a freezer safe Ziploc bag or container. Store them in the freezer for up to 1 month. Make sure to transfer them to a freezer safe bag or container as soon as they harden to prevent freezer burn.
SUBSTITUTIONS
- Greek yogurt: You may substitute the greek yogurt with a dairy-free alternative, like coconut yogurt. Be mindful that coconut yogurt is not as thick, but it still hardens and freezes well. I added maple syrup to the yogurt for a little added sweetness, but you can also use pre-flavored yogurt.
- Berries: You may replace the strawberries and blueberries with any other types of berries such as raspberries or blackberries. You may also replace the berries with chopped mangoes, pineapple, or kiwi for a tropical flavored bark!
RECIPE NOTES
- I used silicone Easter egg molds for these popsicles, but you can use whatever molds or shapes that you have on hand!
- Prior to serving, let the yogurt popsicles sit at room temperature for 2-3 minutes so that they can slightly soften and not be too hard for your little one to take bites from.
- Do not leave the yogurt popsicles at room temperature for too long because they will melt.
- Make sure to transfer the popsicles to a freezer-safe Ziploc bag or container as soon as it fully hardens. This will help prevent it from getting freezer burnt.
- If you choose to add granola, make sure to avoid granola that contains honey for babies under the age of 1.
Here are some other frozen sweet treats that you may like!

Easter Egg Greek Yogurt Popsicles
Ingredients
- 2 cups Greek yogurt
- 2 tbsp maple syrup
- ½ cup diced strawberries
- ¼ cup sliced blueberries
- ¼ cup crushed granola
Instructions
- Place a small amount of yogurt at the bottom of your silicone pan.
- Layer in the chopped berries, granola, and any other toppings of choice.
- Scoop in another tablespoon or so of yogurt until each mold is filled and the toppings are fully covered.
- Stick in the popsicle sticks at an angle as far as they can go without sticking out too much.
- Spoon a little more yogurt over the popsicle indentation to help secure the popsicle stick.
- Place the mold on a baking pan and freeze for at least 2 hours.
Notes
- I used silicone Easter egg molds for these popsicles, but you can use whatever molds or shapes that you have on hand!
- Prior to serving, let the yogurt popsicles sit at room temperature for 2-3 minutes so that they can slightly soften and not be too hard for your little one to take bites from.
- Do not leave the yogurt popsicles at room temperature for too long because they will melt.
- Make sure to transfer the popsicles to a freezer-safe Ziploc bag or container as soon as it fully hardens. This will help prevent it from getting freezer burnt.
- If you choose to add granola, make sure to avoid granola that contains honey for babies under the age of 1.


Can you use frozen berries/fruit?
Yes, you can!😊
I use this recipe in dino-shaped ice pop moulds for my little one and she’s obsessed 😁