
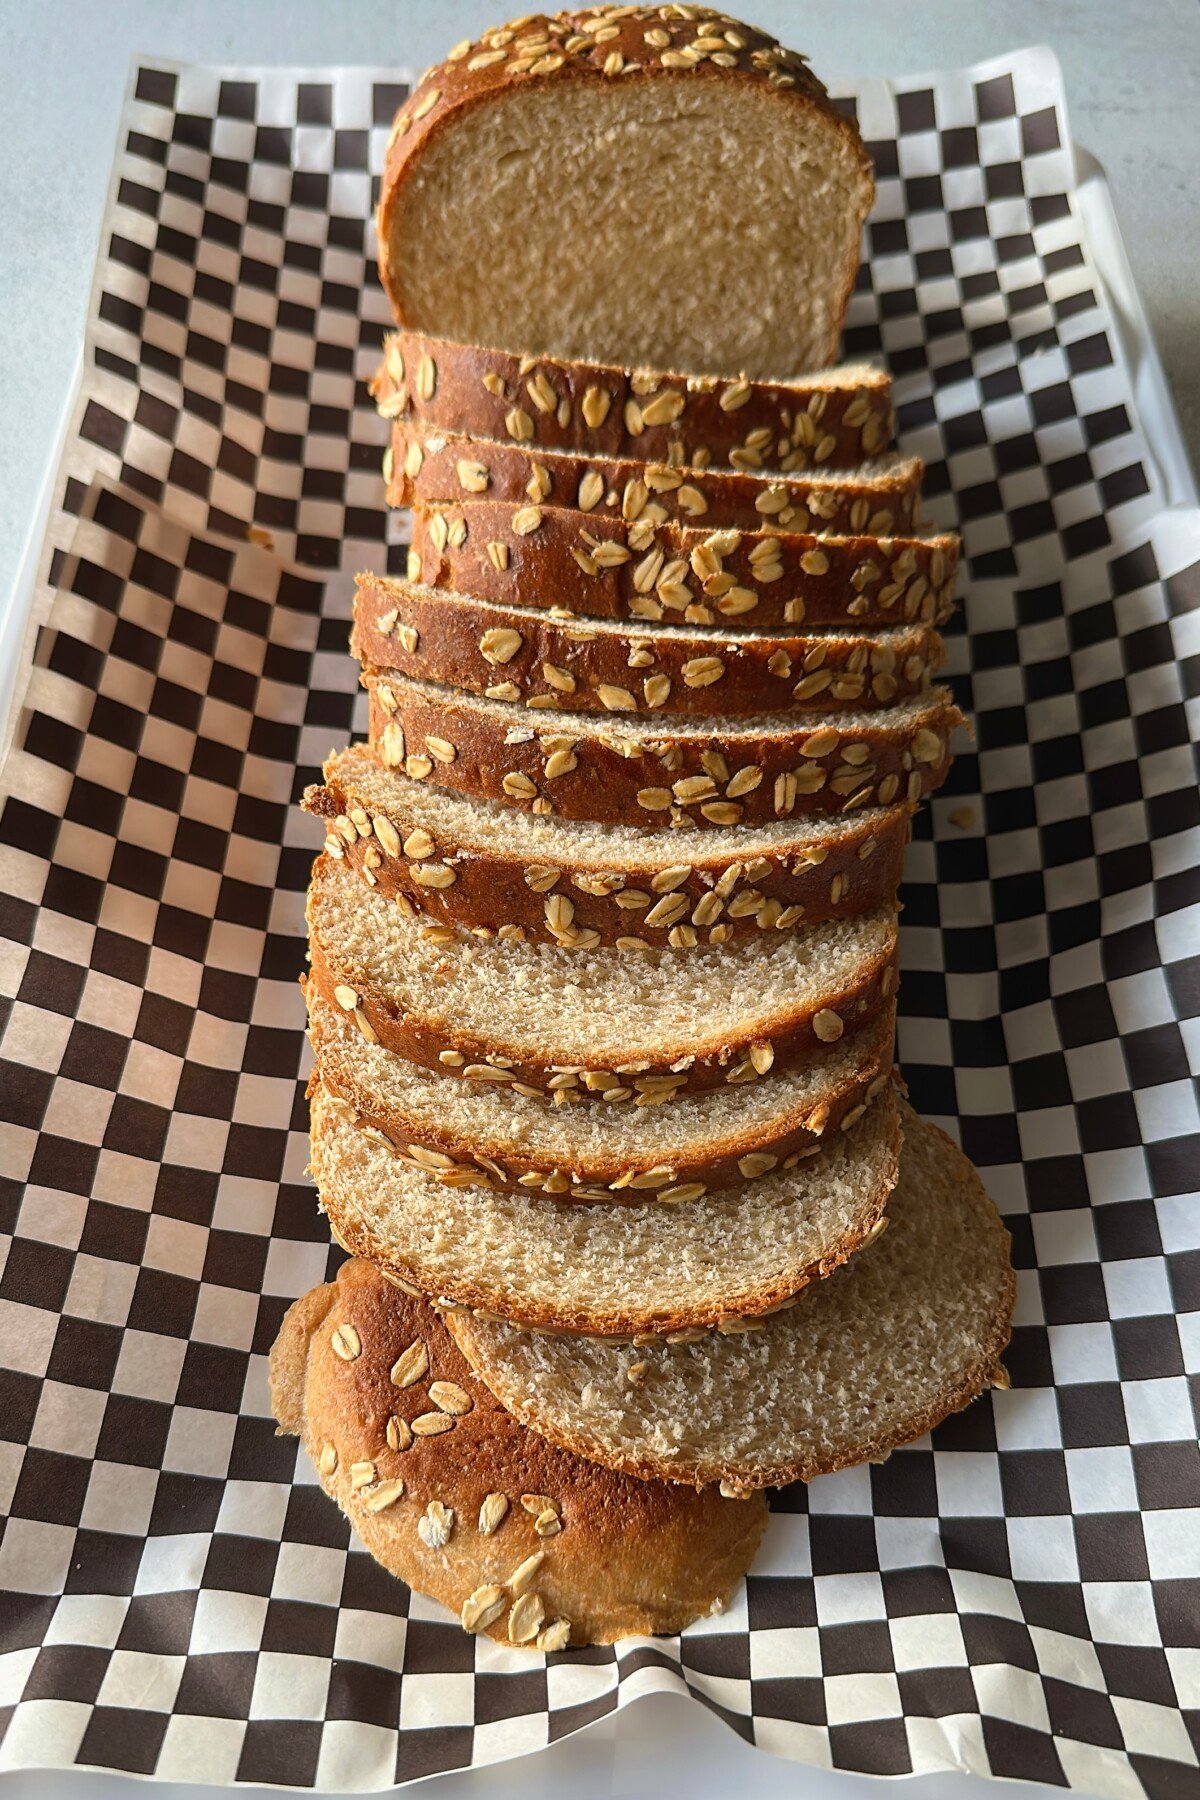
Honey Wheat Sandwich Bread
on Jan 13, 2026
This post may contain affiliate links. Please read our disclosure policy.
Nothing beats the smell of fresh-baked bread, and this honey wheat sandwich bread recipe is sure to become a family favorite. Soft, slightly sweet, and full of wholesome flavor, it’s perfect for sandwiches, school lunches, or breakfast toast. It’s forgiving enough for beginners, so you can enjoy fresh homemade bread any day of the week.
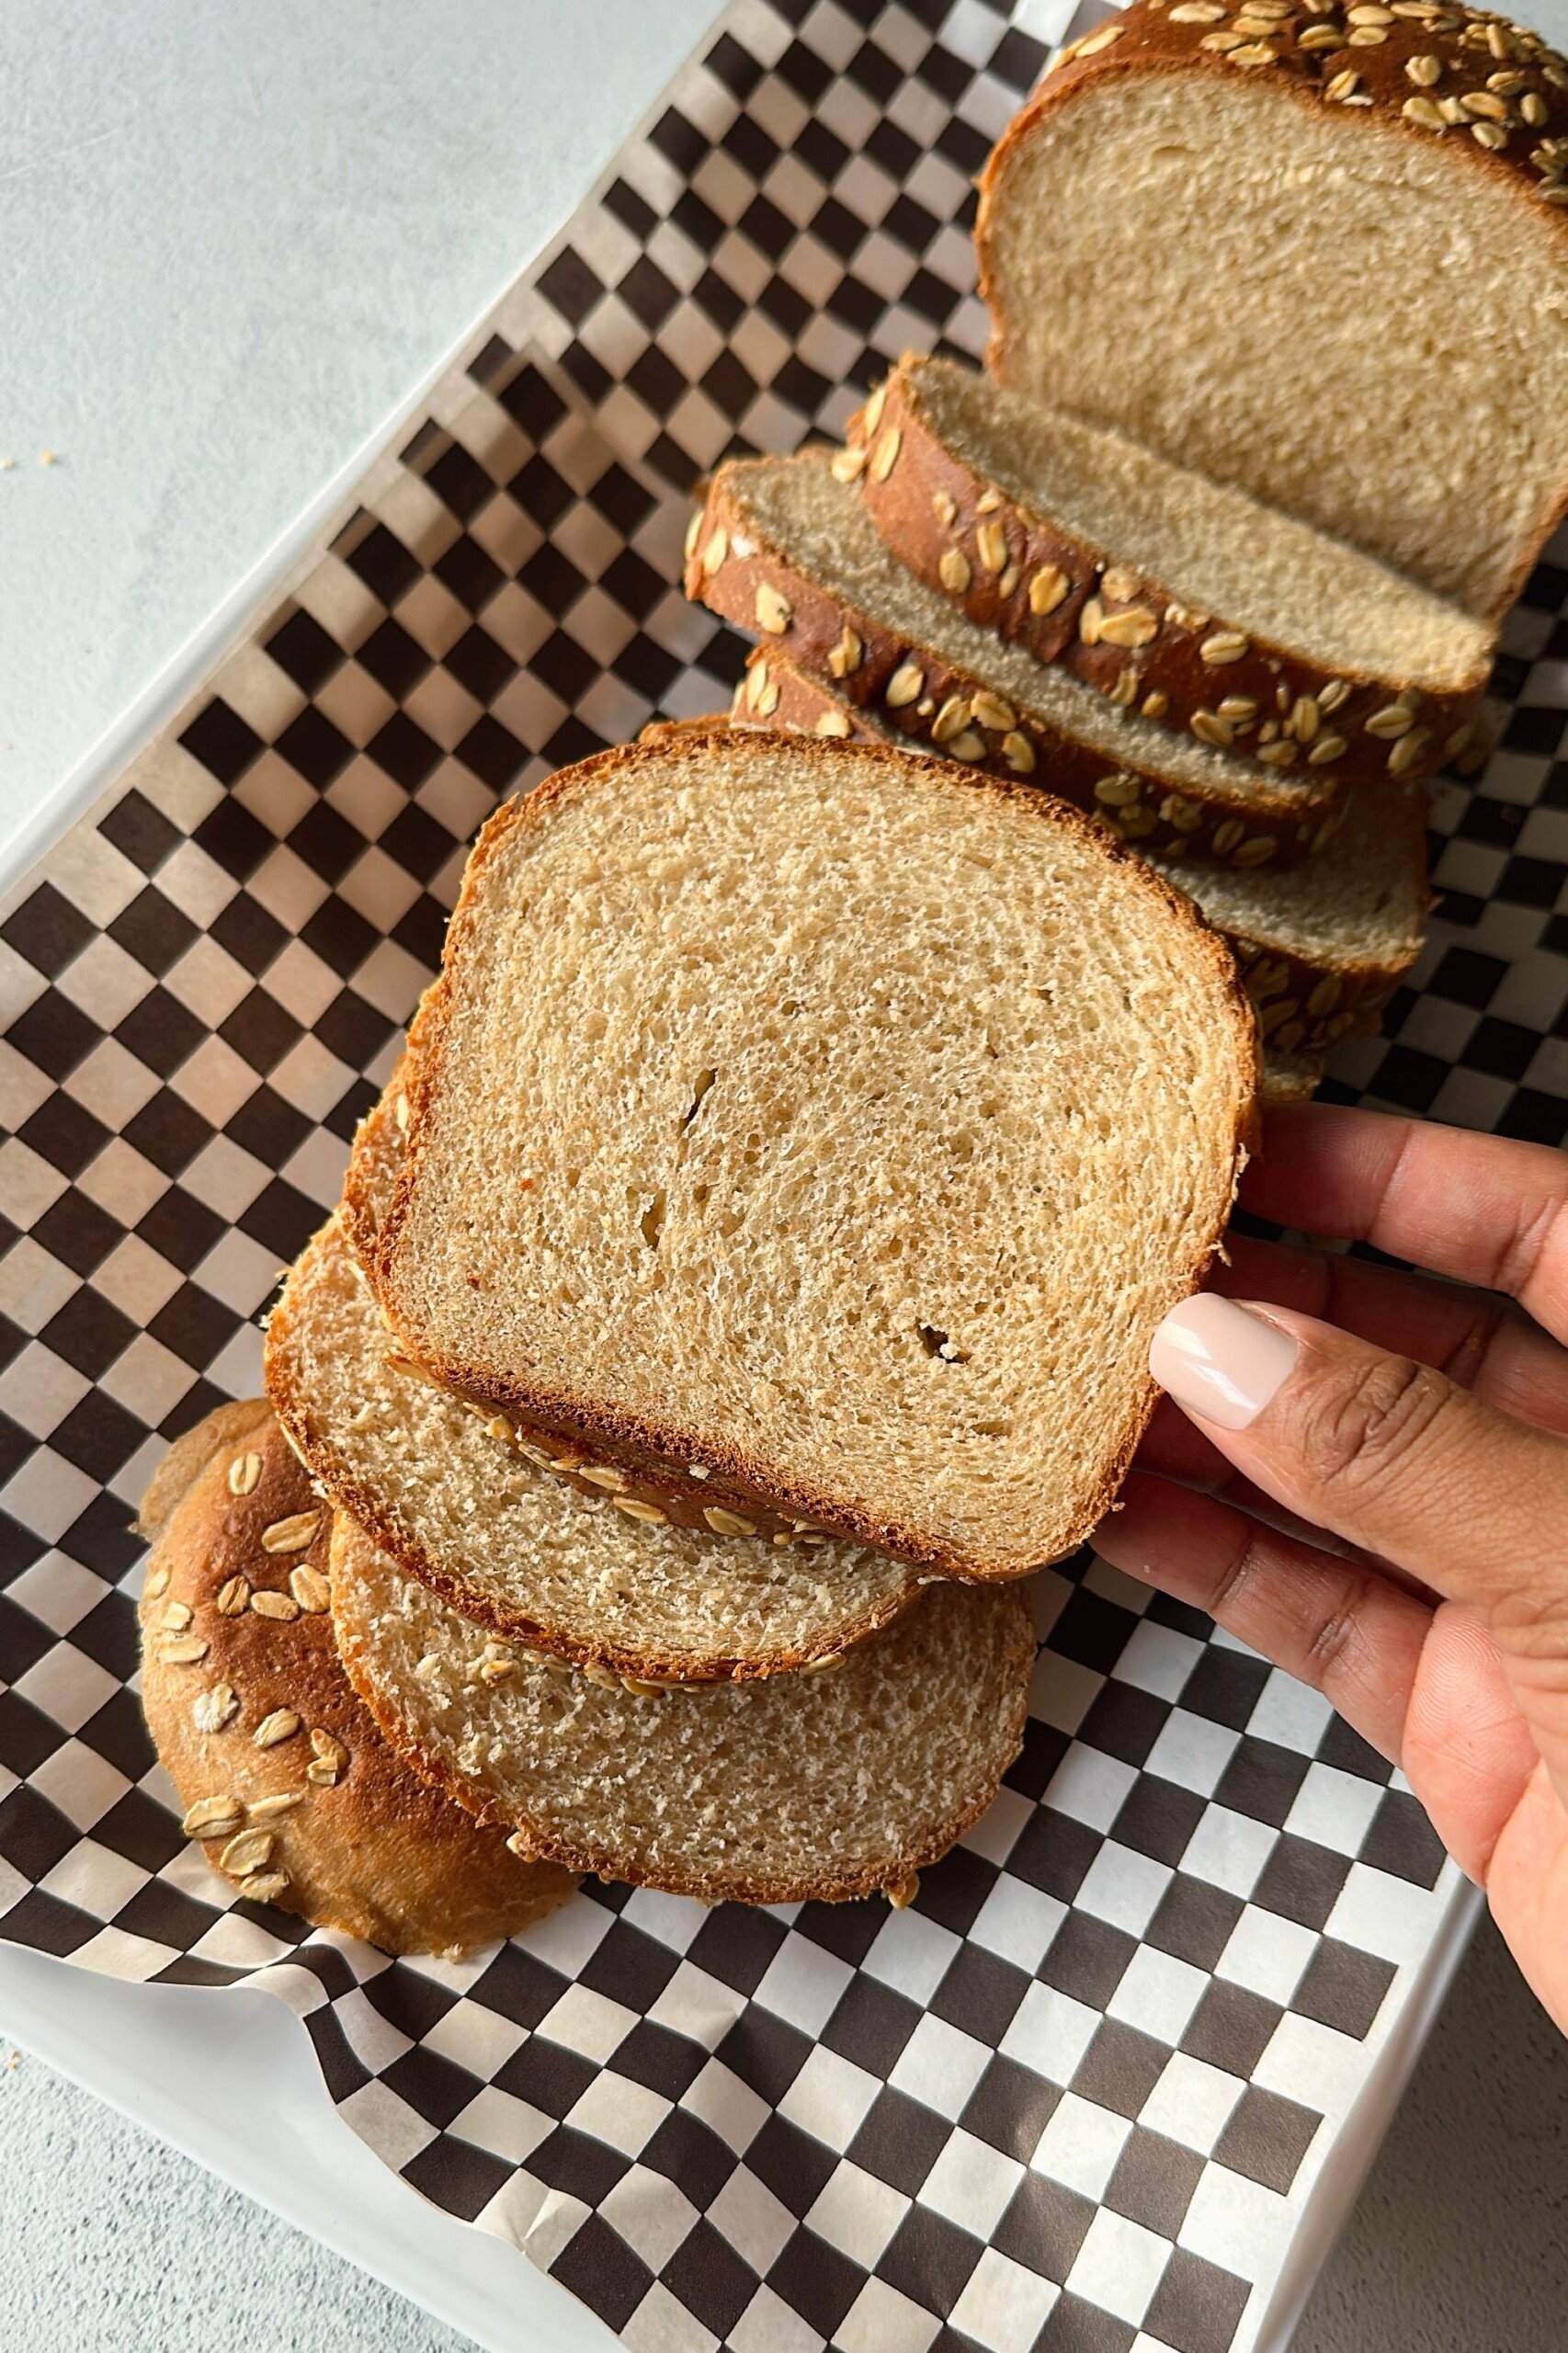
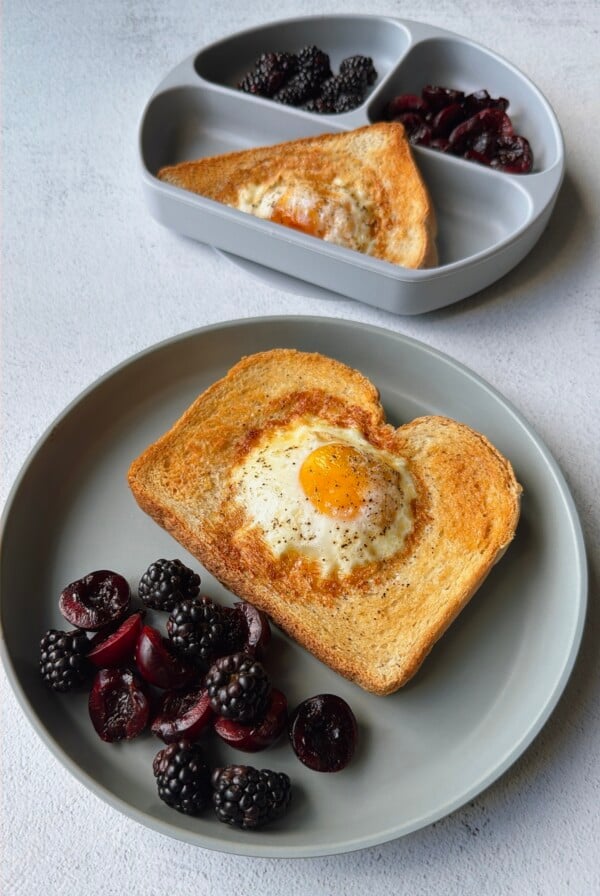
If you’re looking for a soft, slightly sweet loaf that’s perfect for sandwiches, toast, or just snacking straight from the pan, this honey wheat sandwich bread recipe is for you! It’s made with simple ingredients you probably already have, and it’s easy enough even if you’ve never baked bread before. Slice it for breakfast with some butter and jam or pile it high for a lunchtime sandwich. You can keep it simple, or sprinkle a few oats or seeds on top to switch things up. It bakes into a soft, fluffy loaf that everyone will love.
Once you get the hang od making this bread, you may never want to go back to store-bought loaves again. You can use it in other fun recipes like these peanut butter banana French toast sticks, blueberry French toast bake, and strawberry cheesecake French toast roll ups for a breakfst twist.
Table of Contents
What You’ll Need
Here is what you’ll need to make this honey wheat sandwich bread recipe:
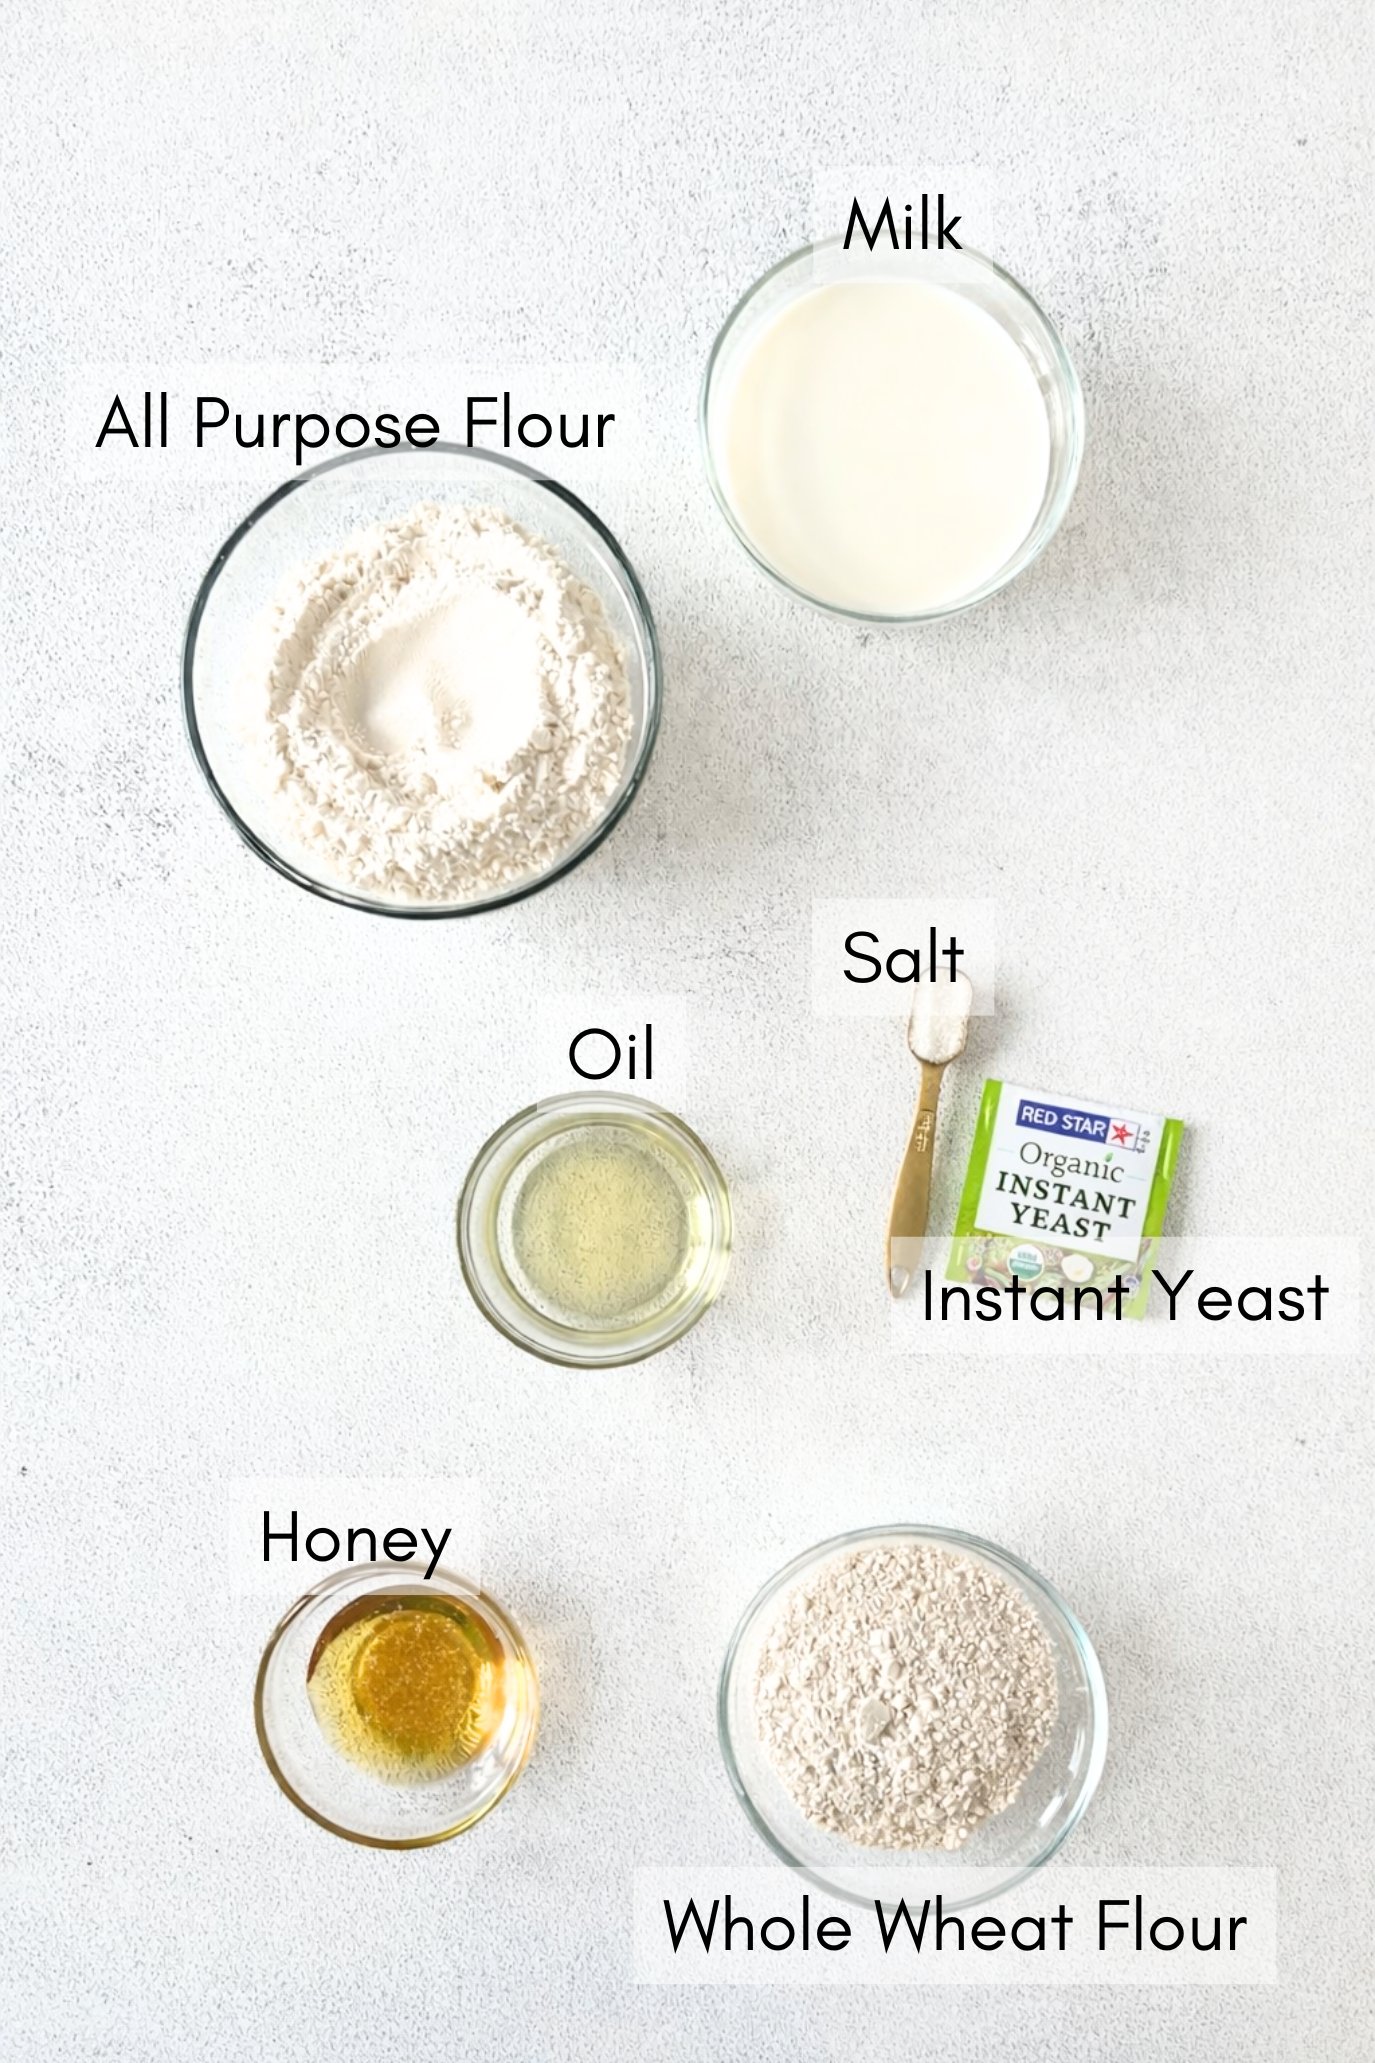
- Milk: Adds softness to the bread. Warm milk helps to activate the yeast.
- Instant Yeast: This makes the bread rise. I love using instant yeast because it makes the process much quicker.
- Honey: Adds a slight natural sweetness to the bread.
- Oil: Keeps the bread moist and soft for days.
- Whole Wheat Flour: Provides a nutty flavor and added fiber.
- All Purpose Flour: Gives the bread the structure it needs to stay light and airy.
- Salt: For added flavor and taste.
See the recipe card below for full information on ingredients and quantities.
Ingredient Substitutions & additions
- Milk: You can swap dairy milk with any unsweetened plant-based milk or water. Just make sure the liquid is warm so the yeast activates quickly.
- Honey: Maple syrup or granulated sugar can be used in place of honey.
- Oil: Melted butter can be used instead of oil for a richer flavor.
- Optional* Oats: I love sprinkling some rolled oats on top of the dough before baking for a fun touch.
Step-by-Step Instructions
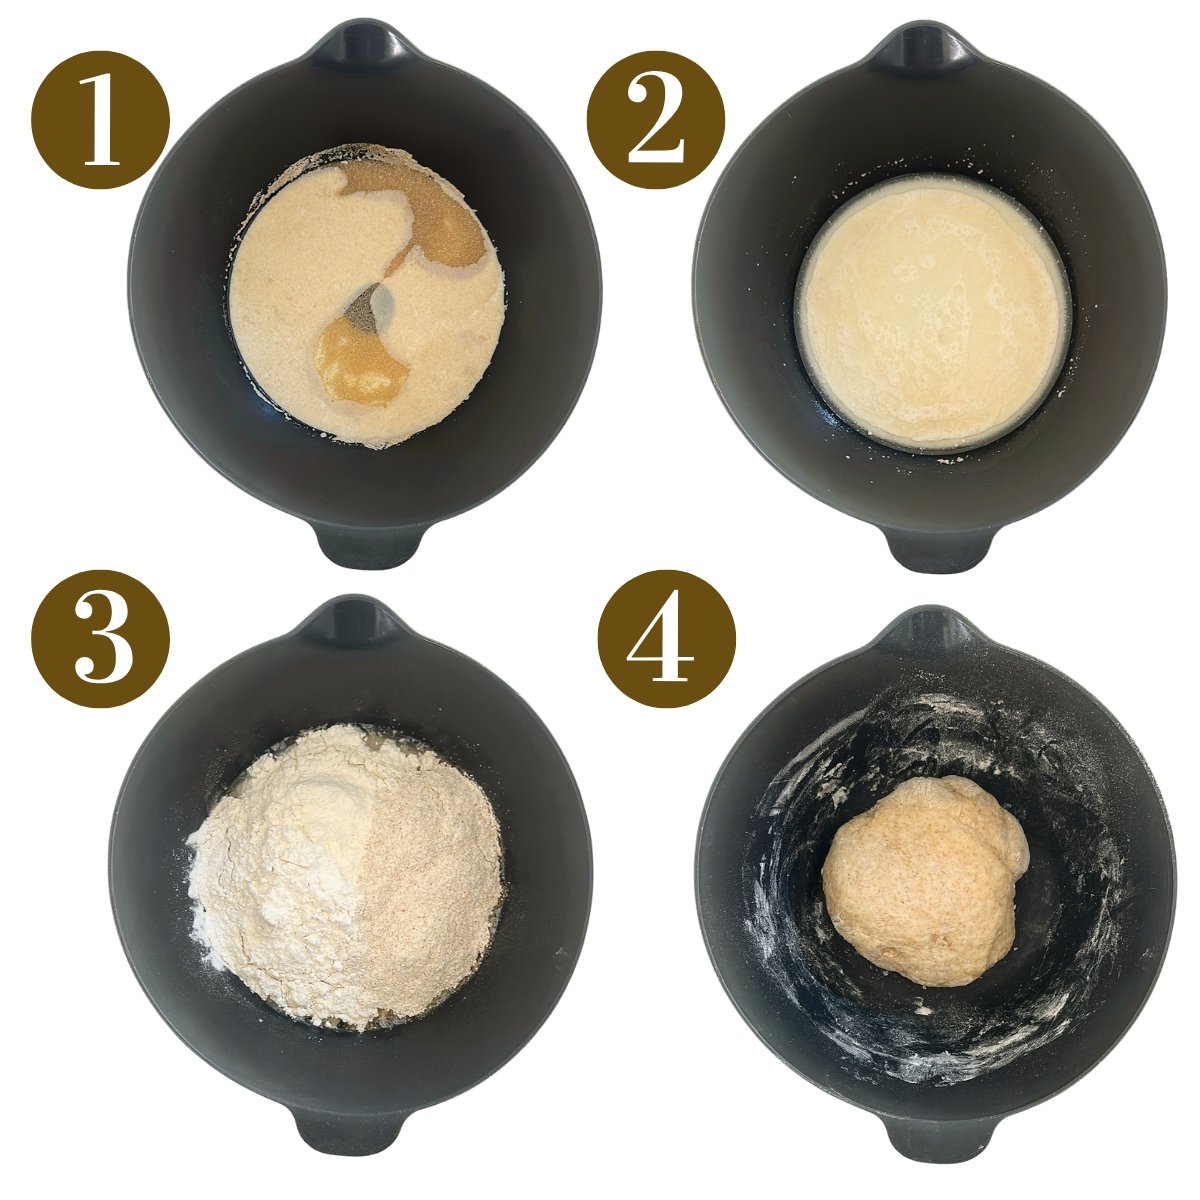
STEP 1: In a large bowl, whisk together the warm milk, honey, oil, and instant yeast. Let it sit for about 5 minutes (Images 1 & 2). Grease a 9-inch by 5-inch loaf pan or line it with parchment paper.
STEP 2: Add the whole wheat flour, all-purpose flour, and the salt. Use a spoon to mix until a shaggy dough forms (Images 3 & 4).

STEP 3: Knead the dough for about 10 to 15 minutes by hand or 8 to 10 minutes on low speed (speed 2) in a stand mixer. If the dough is sticky, lightly coat your hands with oil to make it easier to work with. If it is still very sticky, sprinkle a little extra all-purpose flour on the surface as you knead. Be careful not to add too much flour, as it can cause the dough to become dense. The dough should be smooth and slightly tacky, but not sticking to your fingers (Image 5). You’ll know it’s ready when a piece can stretch without tearing easily and when you gently poke the dough, the indent springs back. (Note: If you’re using a stand mixer, it’s ok if the dough sticks a little to the bottom of the bowl, but it shouldn’t stick to the sides. This is normal, and the dough will firm up as it rises).
STEP 4: Form the kneaded dough into a ball and place it in a large greased bowl. Cover with a cloth, and let it rise in a warm spot for about 1 hour or until it has doubled in size (I usually place it in my oven that is turned off to rise) (Images 5 & 6).
STEP 5: Once the dough has doubled in size, gently press it down to release some of the air. Turn it onto a lightly floured surface and pat it into a rectangle (Images 7 & 8).
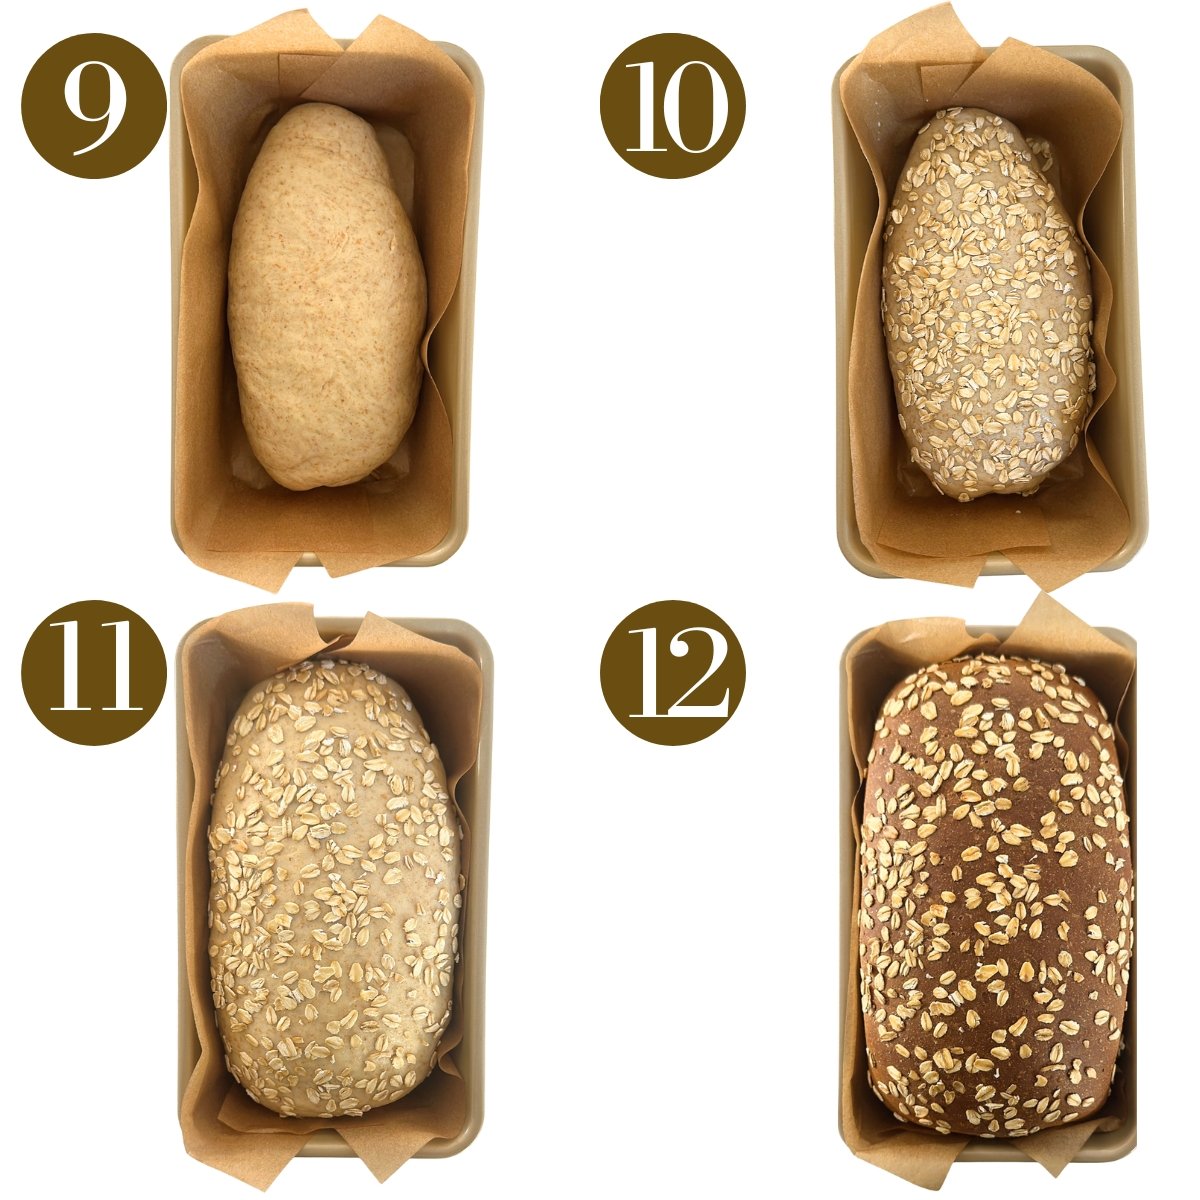
STEP 6: Roll it up from the short end into a log, then pinch the seam closed and tuck the ends underneath. Place the loaf into a greased or parchment-lined 9×5-inch pan (Image 9). (Optional: Brush the top with a little milk and sprinkle rolled oats on top (Image 10). Cover and let it rise again in the pan for 30–45 minutes (Image 11).
STEP 7: In the last few minutes of rising, preheat your oven to 350°F (175°C). Bake the loaf for 30-35 minutes, or until the top is golden brown and the loaf sounds hollow when tapped (Image 12). Let the bread cool in the pan for 10 minutes, then remove it and place it on a cooling rack for 1 hour before slicing.
Storage Instructions
Store cooled bread in an airtight container at room temperature for up to 3 days. For longer storage, slice and freeze in a freezer-safe bag for up to 3 months and toast slices straight from the freezer.

Tips For Success
- Check your milk temperature: The milk should feel warm to the touch, not hot. If it’s too hot, it can kill the yeast and if it’s too cool, the dough may take a long time to rise. Aim for about 105–110°F.
- Make sure to knead the dough long enough to develop the gluten. Under-kneaded dough won’t rise well and can bake up dense and flat. You’ll know it’s ready when a piece can stretch without tearing easily and when you gently poke the dough, the indent springs back.
- Don’t add too much flour! It’s tempting to keep adding flour if the dough is sticky, but a slightly tacky dough bakes up softer. Add only what you need for it to come together.
- Cool fully before slicing. Let the bread cool in the pan for about 10 minutes, then transfer to a wire rack to cool for 1 hour. Slicing too early can make the bread texture gummy.
- For a softer crust, brush the top lightly with melted butter right after it comes out of the oven.
- *This bread is NOT suitable for babies under the age of 1*

Recipe FAQs
Yes. Dissolve it in the warm milk and honey for about 10 minutes until foamy, then continue with the recipe. Note that it will take longer to rise the first and second times with active dry yeast.
This usually happens if the yeast was expired, the milk was too hot and killed the yeast, or the dough was left to rise in a very cold environment. Make sure your yeast is fresh and the dough is kept somewhere warm.
You’ll know it’s ready when a piece can stretch without tearing easily and when you gently poke the dough, the indent springs back.
Other Bread Recipes You’ll Love

Everything Bagel Bites


Easiest Cinnamon And Raisin Bagels
Cottage Cheese Rolls
If you tried this Honey Wheat Sandwich Bread Recipe , please leave a ⭐ star rating and let me know how it went in the comments below! I love hearing from you!
Honey Wheat Sandwich Bread
Ingredients
- 1 cup warm milk
- 3 tbsp honey
- 2 tbsp oil
- 1 packet instant yeast (quick rise), about 2¼ tsp
- 1 tsp salt
- 1 cup whole wheat flour
- 2 cups + 2 tbsp all purpose flour
Instructions
- In a large bowl, whisk together the warm milk, honey, oil, and instant yeast. Let it sit for about 5 minutes. Grease a 9-inch by 5-inch loaf pan or line it with parchment paper.
- Add the whole wheat flour, all-purpose flour, and the salt. Use a spoon to mix until a shaggy dough forms.
- Knead the dough for about 10 to 15 minutes by hand or 8 to 10 minutes on low speed (speed 2) in a stand mixer. If the dough is sticky, lightly coat your hands with oil to make it easier to work with. If it is still very sticky, sprinkle a little extra all-purpose flour on the surface as you knead. Be careful not to add too much flour, as it can cause the dough to become dense. The dough should be smooth and slightly tacky, but not sticking to your fingers. You’ll know it’s ready when a piece can stretch without tearing easily and when you gently poke the dough, the indent springs back. (Note: If you're using a stand mixer, it's ok if the dough sticks a little to the bottom of the bowl, but it shouldn’t stick to the sides. This is normal, and the dough will firm up as it rises).
- Form the kneaded dough into a ball and place it in a large greased bowl. Cover with a cloth, and let it rise in a warm spot for about 1 hour or until it has doubled in size (I usually place it in my oven that is turned off to rise).
- Once the dough has doubled in size, gently press it down to release some of the air. Turn it onto a lightly floured surface and pat it into a rectangle. Roll it up from the short end into a log, then pinch the seam closed and tuck the ends underneath. Place the loaf into a greased or parchment-lined 9×5-inch pan. (Optional: Brush the top with a little milk and sprinkle rolled oats on top.) Cover and let it rise again in the pan for 30–45 minutes.
- In the last few minutes of rising, preheat your oven to 350°F (175°C). Bake the loaf for 30-35 minutes, or until the top is golden brown and the loaf sounds hollow when tapped. Let the bread cool in the pan for 10 minutes, then remove it and place it on a cooling rack for 1 hour before slicing.
Notes
- Check your milk temperature: The milk should feel warm to the touch, not hot. If it’s too hot, it can kill the yeast, and if it’s too cool, the dough may take a long time to rise. Aim for about 105–110°F.
- Make sure to knead the dough long enough to develop the gluten. Under-kneaded dough won’t rise well and can bake up dense and flat. You’ll know it’s ready when a piece can stretch without tearing easily, and when you gently poke the dough, the indent springs back.
- Don’t add too much flour! It’s tempting to keep adding flour if the dough is sticky, but a slightly tacky dough bakes up softer. Add only what you need for it to come together.
- Cool fully before slicing. Let the bread cool in the pan for about 10 minutes, then transfer to a wire rack to cool for 1 hour. Slicing too early can make the bread texture gummy.
- For a softer crust, brush the top lightly with melted butter right after it comes out of the oven.
- *This bread is NOT suitable for babies under the age of 1*


So delicious and easy to make! I’m so grateful I found your website
I’m so glad to hear that you enjoyed it, Jen!😊
This was my first attempt at making bread and I’m so happy with how it turned out! It has a great taste and I can’t wait to make it again.
I’m so glad to hear that you enjoyed it, Michelle!😊
This bread looks delicious! Do you think the recipe would work as is using white whole wheat flour as the only flour? Thank you!
Hi Jill! You can swap the flours with white whole wheat, but the loaf would be a little more dense. If possible, I’d recommend keeping in some of the all purpose flour, but if not, it’ll still work😊
Thanks for your response, Lily! I made the bread using a mix of all purpose and whole wheat pastry flour (that’s what I had on hand) and it turned out delicious! I’ll definitely be making this again.
Hello, I walked this bread weekly for my toddler (and myself!) – I would like to make a version for my baby. Do you have any swaps for the honey?
Hi Michelle! You can swap the honey with equal parts maple syrup if you’re making this loaf for a baby under the age of 1😊
Yay! I just made it and it look as good as yours! (I’m so happy) thank you so much for sharing your knowledge and making my day a little less stressful 💕