Healthy Watermelon Popsicles
on Jul 15, 2024
This post may contain affiliate links. Please read our disclosure policy.
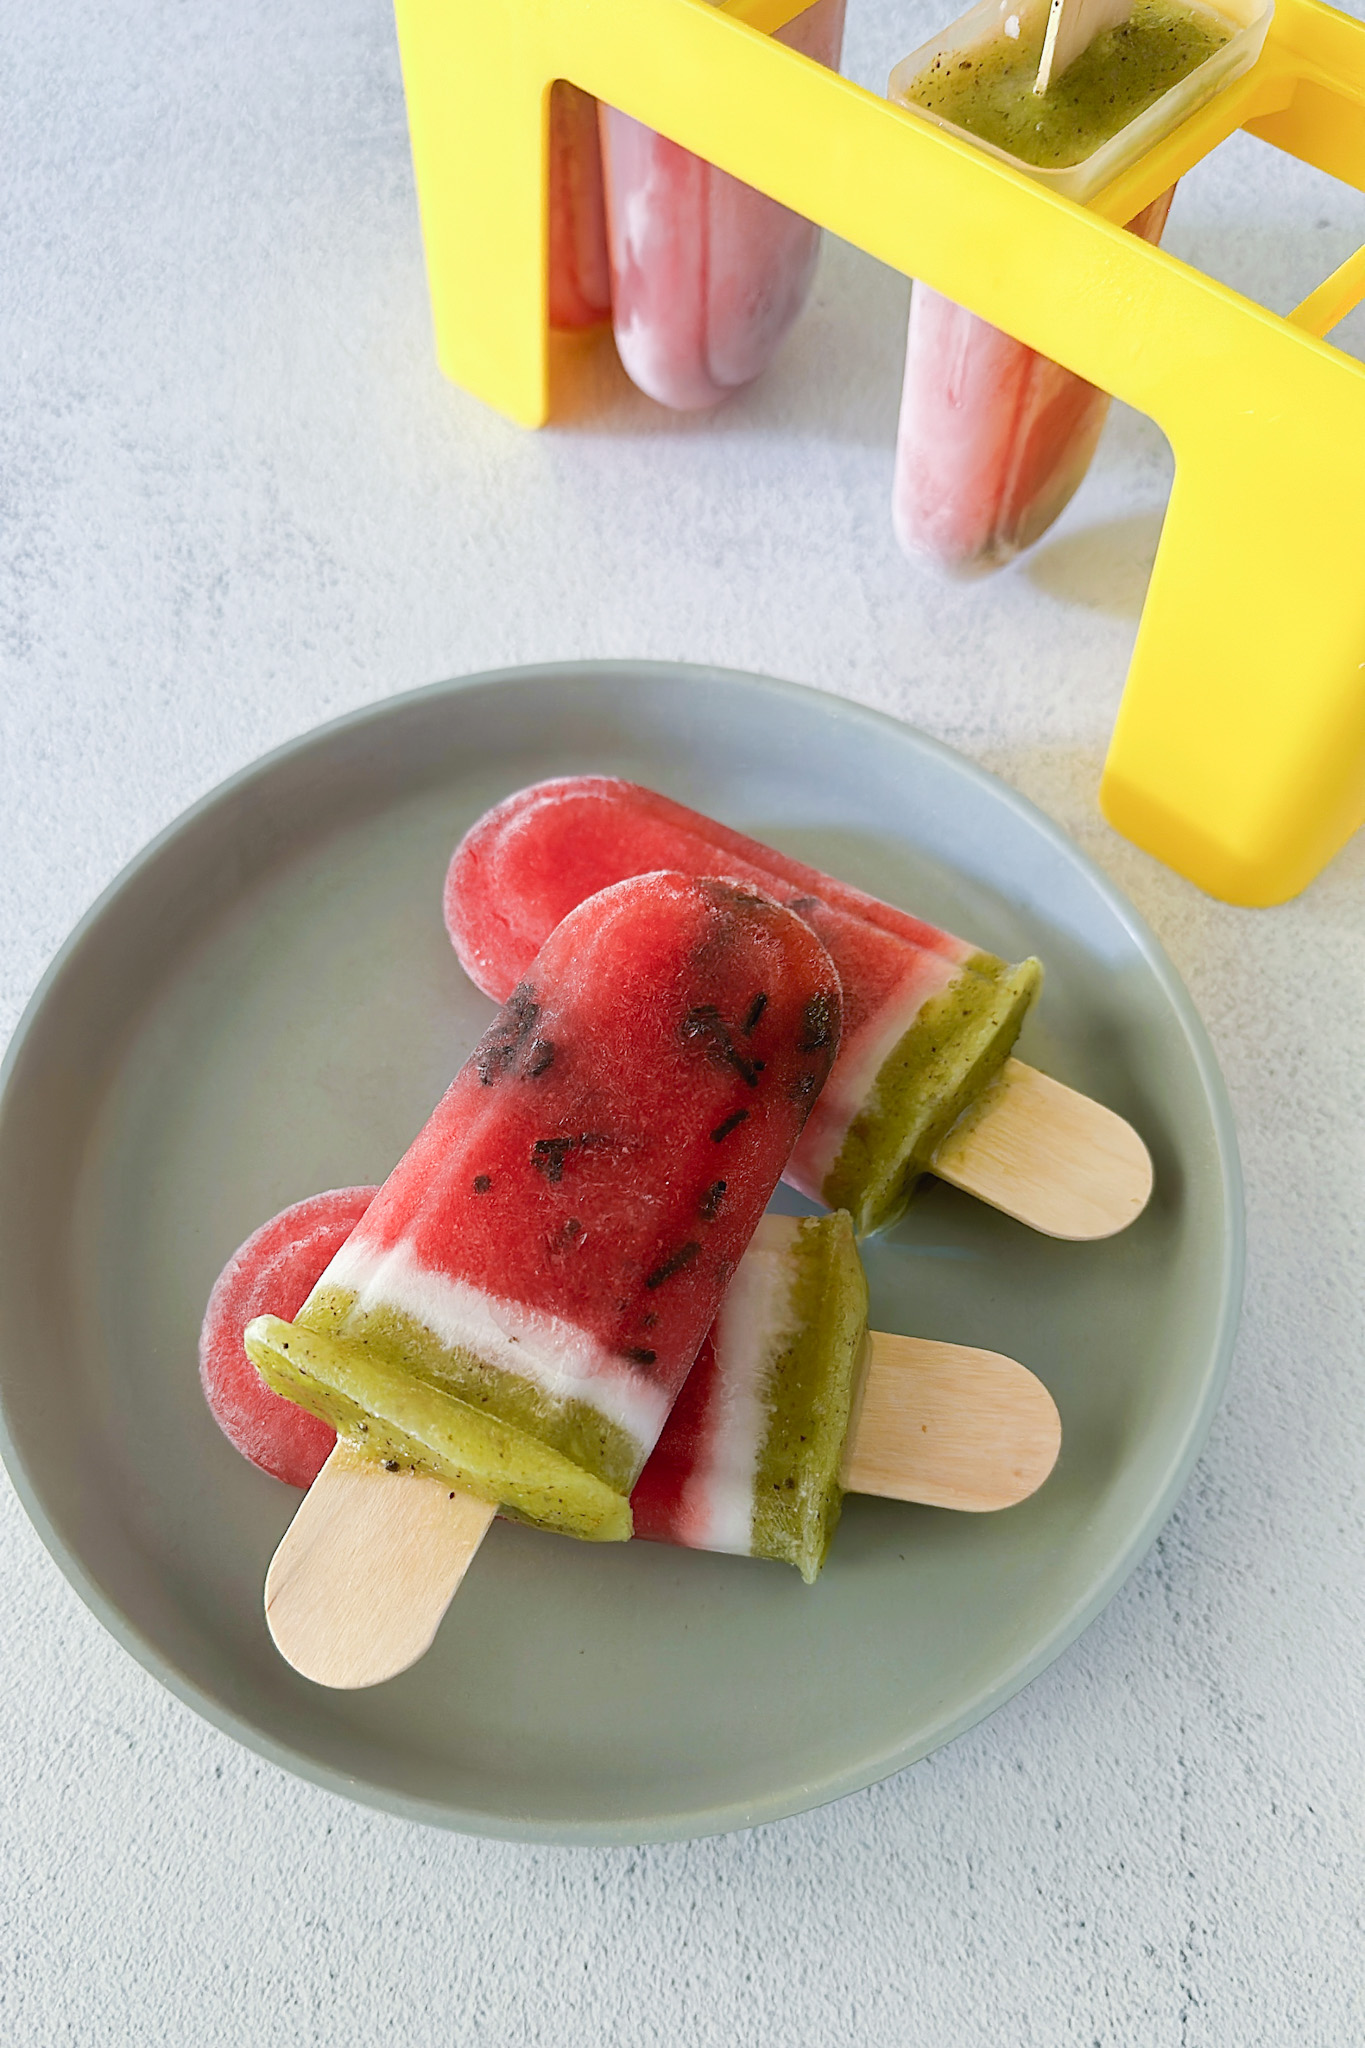
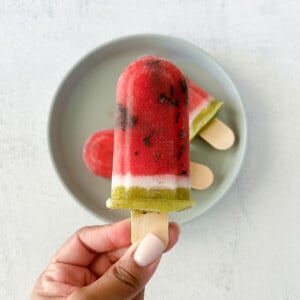
These healthy watermelon popsicles are the perfect, sweet treat for those hot summer days! Made with real fruits and a fun watermelon shape, these are bound to be your new favorite refreshing snack!
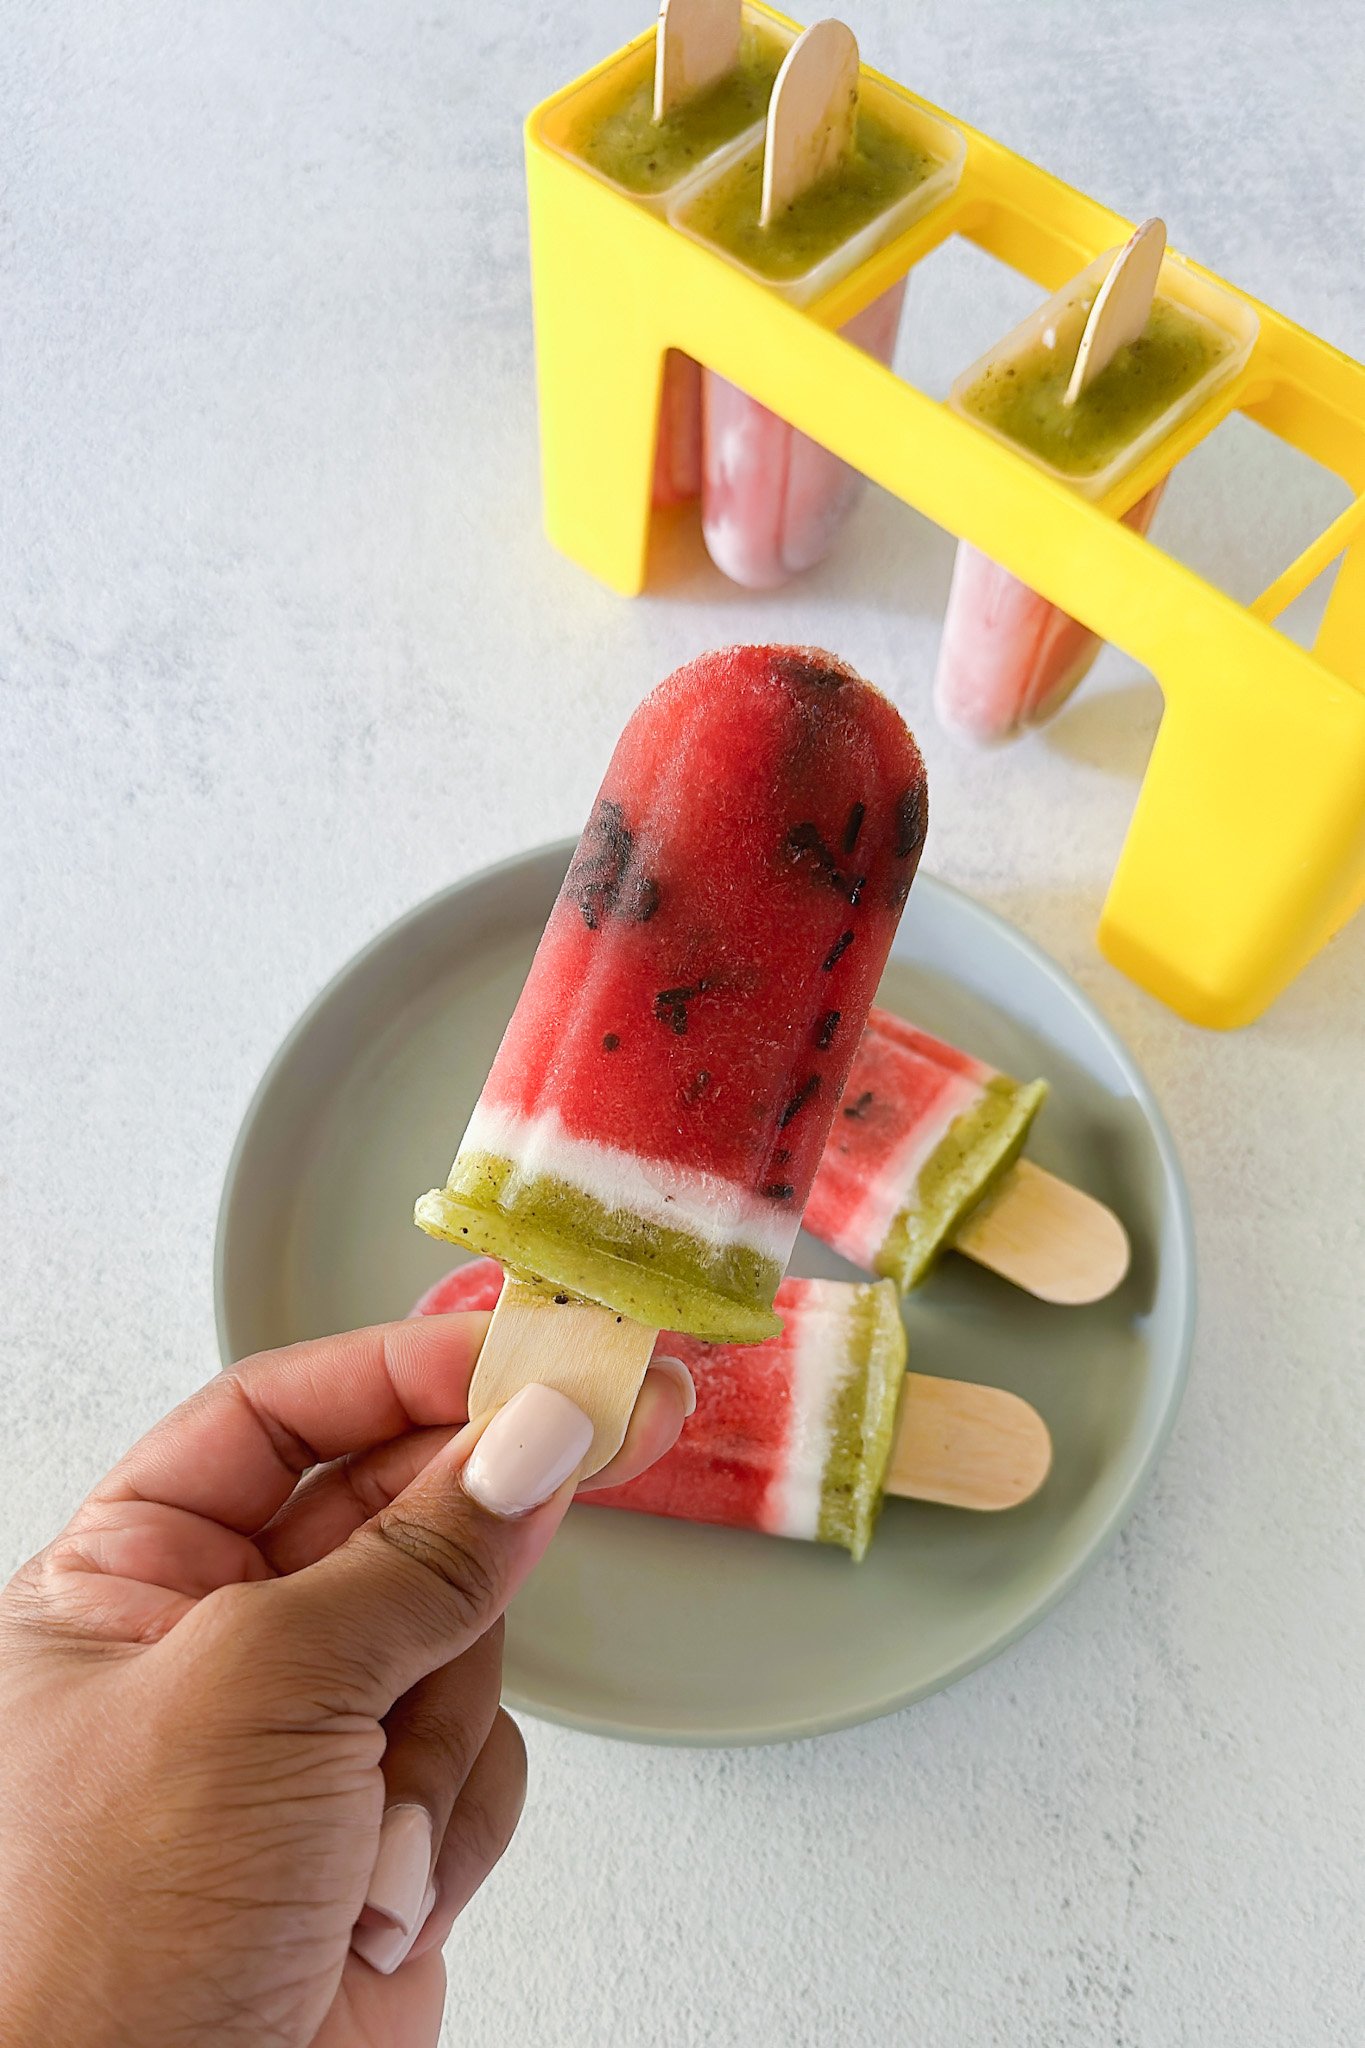
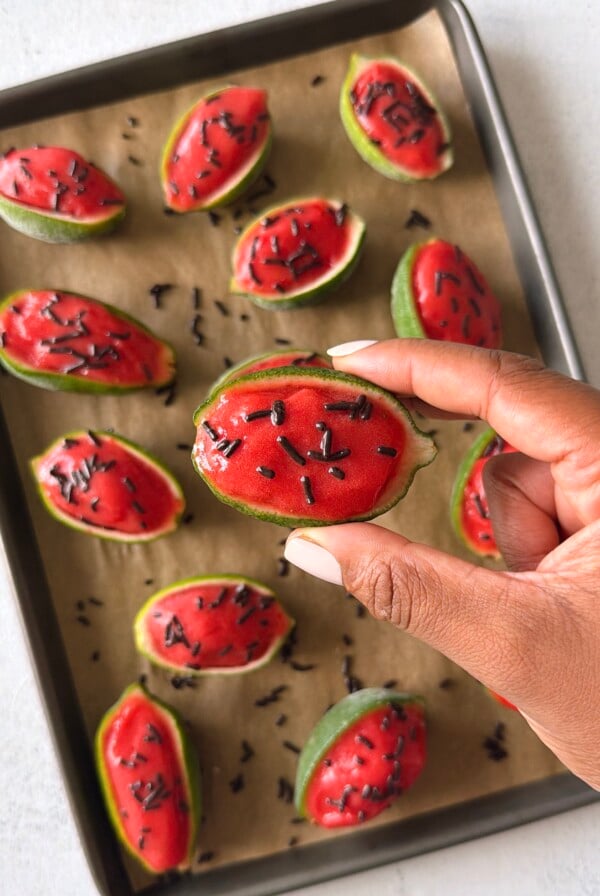
If you’re looking for a fun new way to serve up some fruits, these popsicles are for you! They’re much healthier than storebought popsicles that oftentimes contain added sugar and artificial ingredients and the fun watermelon shape is irresistible! I love using chocolate sprinkles, coconut milk, and kiwis to make them resemble real watermelon slices, but feel free to skip those steps for simple watermelon pops as well!
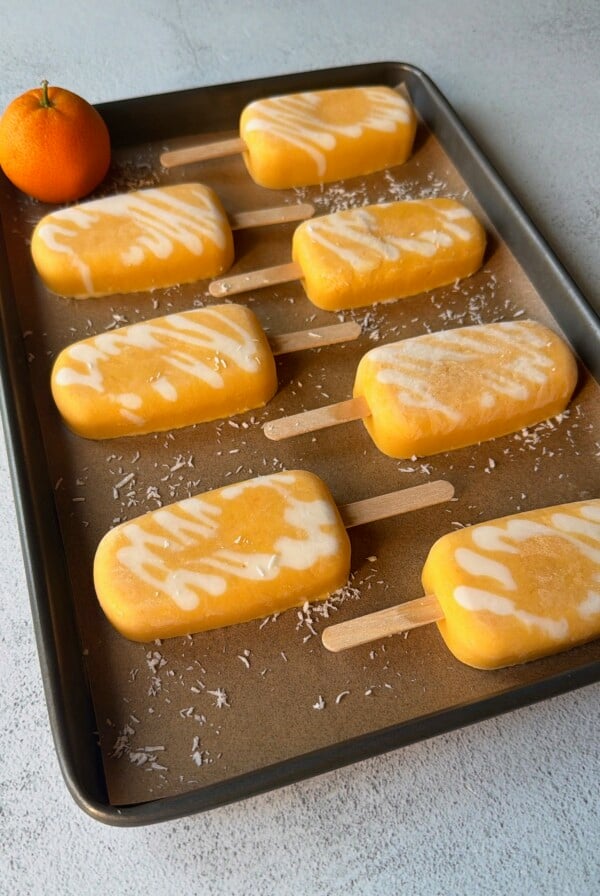
If you love these popsicles and are looking for more simple summer treats, be sure to try out these creamy blueberry cheesecake popsicles, refreshing frozen yogurt bark, and this 3-ingredient mango banana nice cream as well!
Table of Contents
What You’ll Need
Here is what you’ll need to make these healthy watermelon popsicles:
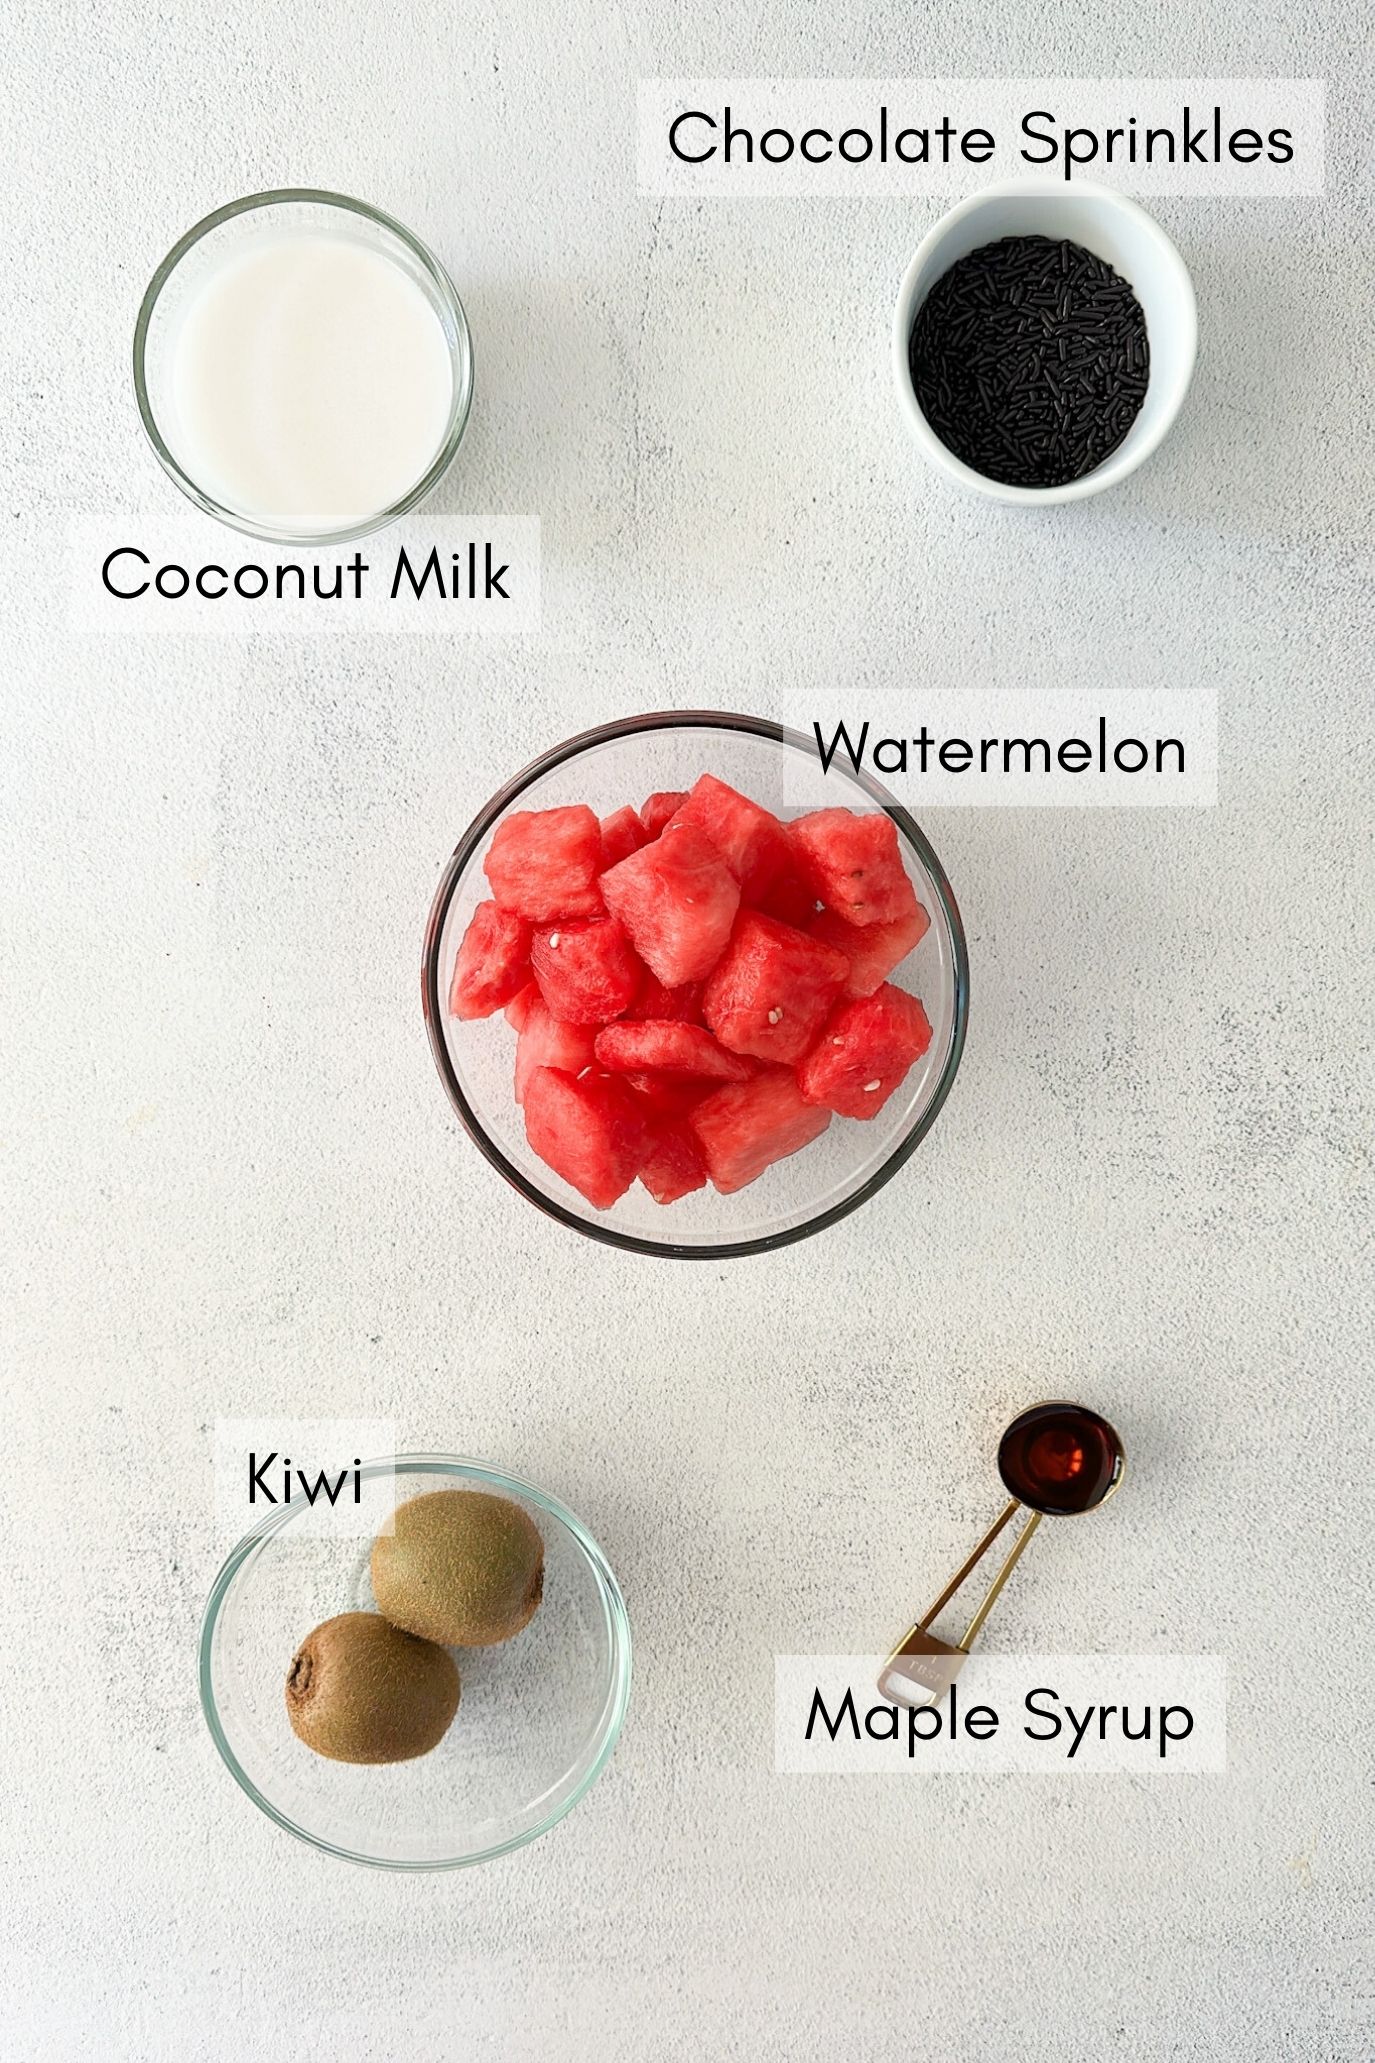
- Watermelon: The star ingredient for these popsicles. Opt for watermelon chunks that are juicy and sweet since this will provide the main sweetness for the popsicles.
- Coconut Milk: For the white layer of the watermelon pops. I used canned unsweetened coconut milk, but feel free to add in a little maple syrup for sweetness if desired.
- Kiwis: For the green layer of the watermelon popsicles. Kiwis tend to be a little tart, so I like to sweeten it with a touch of maple syrup, but feel free to omit this if your watermelon chunks are sweet!
- Maple Syrup: Optional ingredient to sweeten the kiwi layer.
- Chocolate Sprinkles: Optional ingredient to resemble watermelon seeds.
See the recipe card below for full information on ingredients and quantities.
Ingredient Substitutions
- Watermelon: Feel free to swap the watermelon with strawberries, or blend them both together for a watermelon-strawberry base!
- Coconut Milk: The coconut milk can be swapped with any other milk or a thin-style yogurt.
- Chocolate Sprinkles: The chocolate sprinkles can be swapped with mini chocolate chips for that same watermelon seed effect. It can also be omitted completely and they’ll still resemble watermelon popsicles!
Step By Step Instructions
- Blend the watermelon chunks in a high-powered blender until it is liquid and smooth (shake the blender as needed).
- Pour the watermelon liquid about 3/4 of the way full into each popsicle mold. Place this in the freezer for about 1 hour, or until it becomes a slushy-like texture.
- Once a slushy-like texture is achieved, sprinkle about 1 teaspoon of chocolate sprinkles into each mold and use a fork to push the sprinkles into the sides of the popsicles so that they will show up clearly at the end. If your sprinkles sink to the bottom, this means that the watermelon is not frozen enough. You’ll want it to be a slushy texture where the sprinkles won’t sink, but not too frozen so that they can’t be pushed down. Place a popsicle stick in each mold (it should hold up with the slushy texture) and place the molds back in the freezer for about 3 hours, or until fully frozen.
- Once the watermelon layer is frozen, pour about 1 tablespoon of coconut milk in each mold to form the white layer. Place the molds back in the freezer for 30 minutes to 1 hour, or until this layer hardens completely.
- Once the coconut milk layer is frozen, blend the kiwi chunks until they form into a thick paste. Pour about 1 tablespoon of the kiwi mixture into each mold to form the green layer. Place the molds back in the freezer for 30 minutes to 1 hour, or until this layer hardens completely.
- Once ready to serve, remove the popsicles from the mold. If needed, run the molds under warm water for a few seconds until the popsicles loosen and pop out easily.
Storage Instructions
Once the popsicles harden, remove them from the popsicle molds and transfer them to a freezer-safe Ziploc bag or container. Store them in the freezer for up to 1 month. Transferring them to a freezer-safe bag will help prevent freezer burn, but if you plan to eat them within a few days, you can store them in the molds.
Tips For Success
- If you prefer to skip the steps of creating watermelon “seeds” and layers, you can skip those steps and just work with the watermelon layer! They will be just as refreshing!
- If your watermelon chunks aren’t very sweet or your kiwis are too tart, feel free to blend in a little maple syrup for added sweetness.
- This is a great snacktivity to get your little ones involved in! My boys loved getting to see the layers form and adding in the chocolate sprinkles to resemble real seeds!

Recipe FAQs
Yes! Strawberries also work great, but you may want to add in a little maple syrup depending on the sweetness of your strawberries.
Mini chocolate chips also work great to resemble watermelon seeds! You can also omit this step completely and they will still resemble watermelon pops.
More refreshing treats you’ll love
Homemade Yogurt Melts
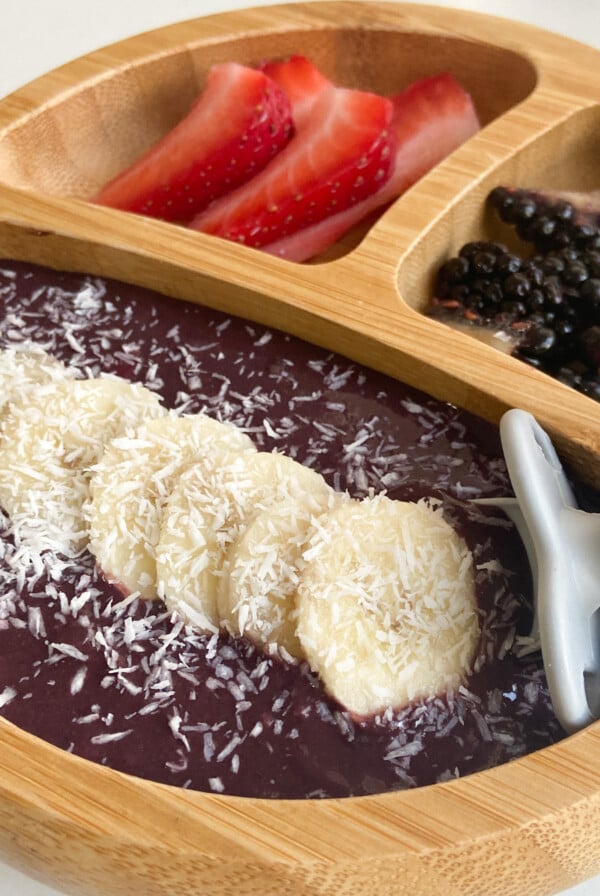
Healthy Acai Bowl
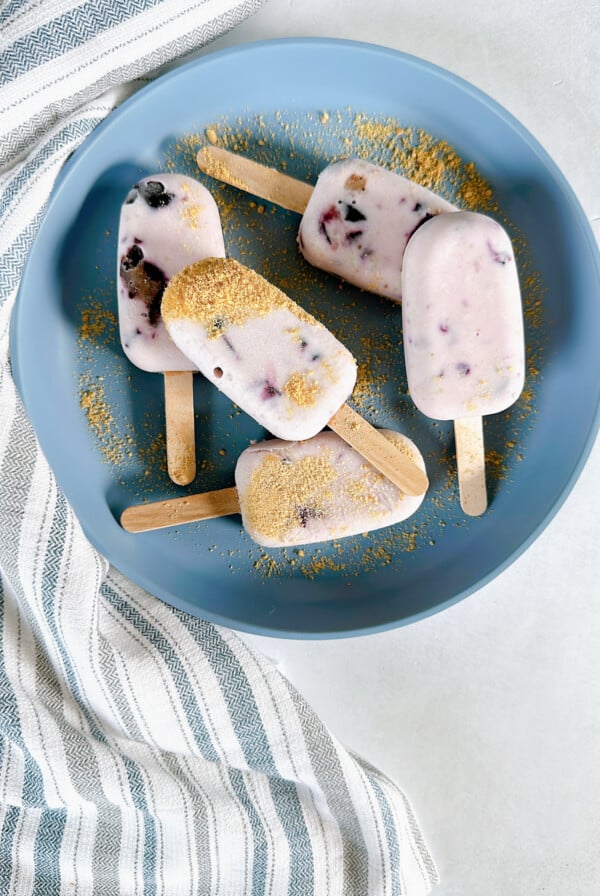
Blueberry Cheesecake Popsicles
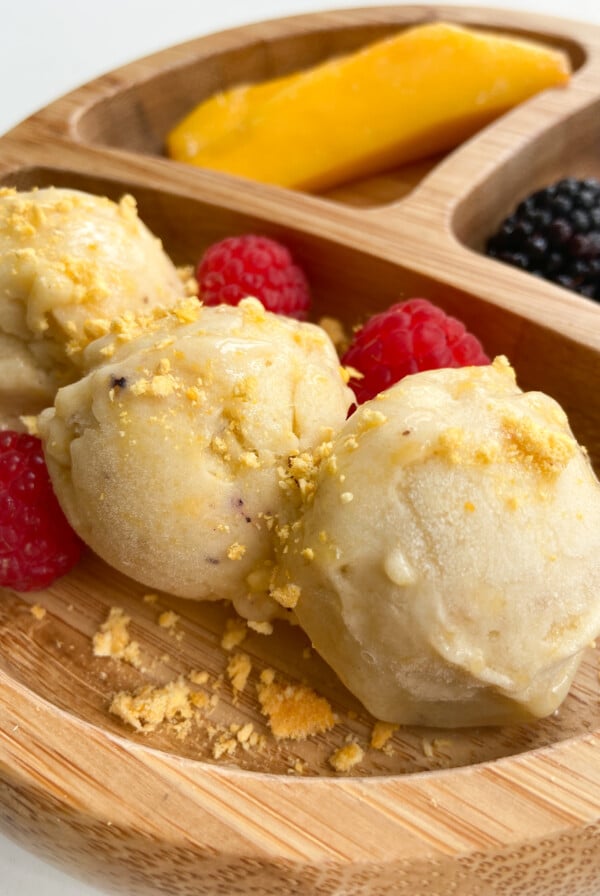
Banana Mango Ice Cream
Healthy Watermelon Popsicles
Equipment
Ingredients
- 3 cups watermelon chunks
- ⅓ cup coconut milk
- 2 large kiwis
- 2 – 3 tbsp chocolate sprinkles
- ½ tbsp maple syrup, optional for added sweetness
Instructions
- Blend the watermelon chunks in a high-powered blender until it is liquid and smooth (shake the blender as needed).
- Pour the watermelon liquid about 3/4 of the way full into each popsicle mold. Place this in the freezer for about 1 hour, or until it becomes a slushy-like texture.
- Once a slushy-like texture is achieved, sprinkle about 1 teaspoon of chocolate sprinkles into each mold and use a fork to push the sprinkles into the sides of the popsicles so that they will show up clearly at the end. If your sprinkles sink to the bottom, this means that the watermelon is not frozen enough. You'll want it to be a slushy texture where the sprinkles won't sink, but not too frozen so that they can't be pushed down. Place a popsicle stick in each mold (it should hold up with the slushy texture) and place the molds back in the freezer for about 3 hours, or until fully frozen.
- Once the watermelon layer is frozen, pour about 1 tablespoon of coconut milk in each mold to form the white layer. Place the molds back in the freezer for 30 minutes to 1 hour, or until this layer hardens completely.
- Once the coconut milk layer is frozen, blend the kiwi chunks until they form into a thick paste. Pour about 1 tablespoon of the kiwi mixture into each mold to form the green layer. Place the molds back in the freezer for 30 minutes to 1 hour, or until this layer hardens completely.
- Once ready to serve, remove the popsicles from the mold. If needed, run the molds under warm water for a few seconds until the popsicles loosen and pop out easily.
Notes
- If you prefer to skip the steps of creating watermelon “seeds” and layers, you can skip those steps and just work with the watermelon layer! They will be just as refreshing!
- If your watermelon chunks aren’t very sweet or your kiwis are too tart, feel free to blend in a little maple syrup for added sweetness.
- This is a great snacktivity to get your little ones involved in! My boys loved getting to see the layers form and adding in the chocolate sprinkles to resemble real seeds!